Распознавание штрих-кодов из изображения в приложении ASP.NET Core на Angular
В этом разделе
Данное руководство демонстрирует, как создать пустое веб-приложение ASP.NET Core в Visual Studio .NET 2022 и распознать штрих-коды из изображения в приложении ASP.NET Core на Angular.
Вот шаги, которые необходимо выполнить:
-
Создайте пустое веб-приложение ASP.NET Core.
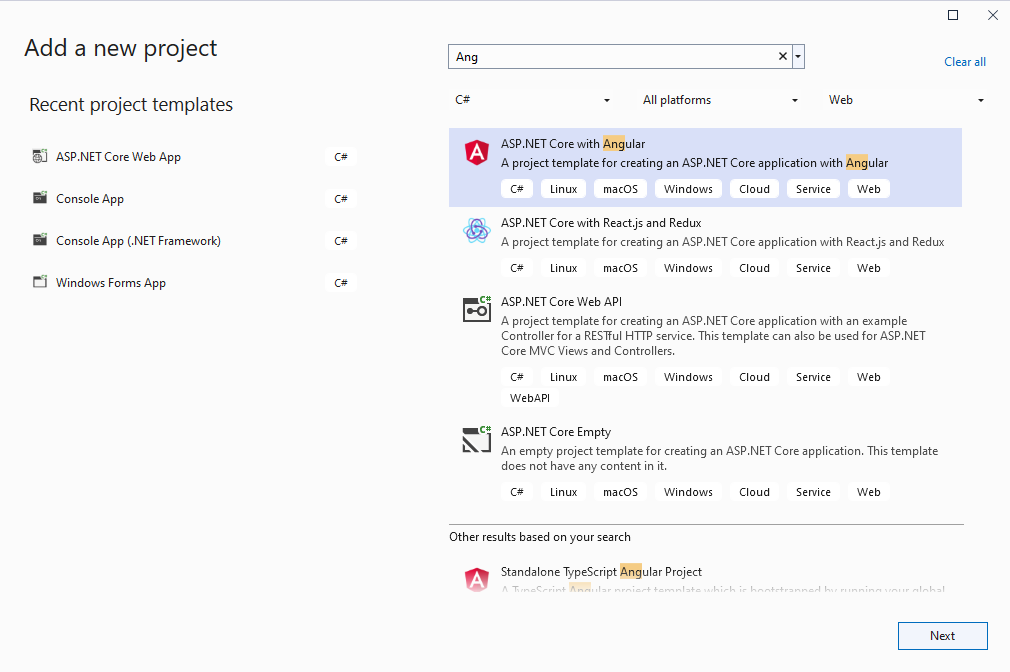
Запустите Visual Studio .NET 2022 и создайте новый проект, тип проекта - приложение ASP.NET Core на Angular:
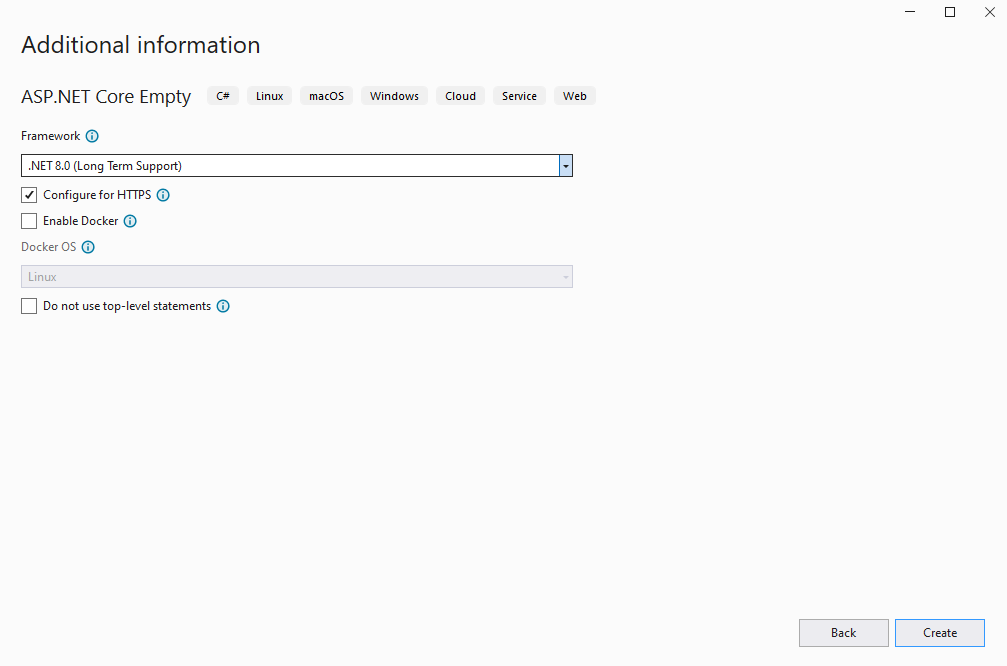
Включите в проекте использование .NET 8.0:
-
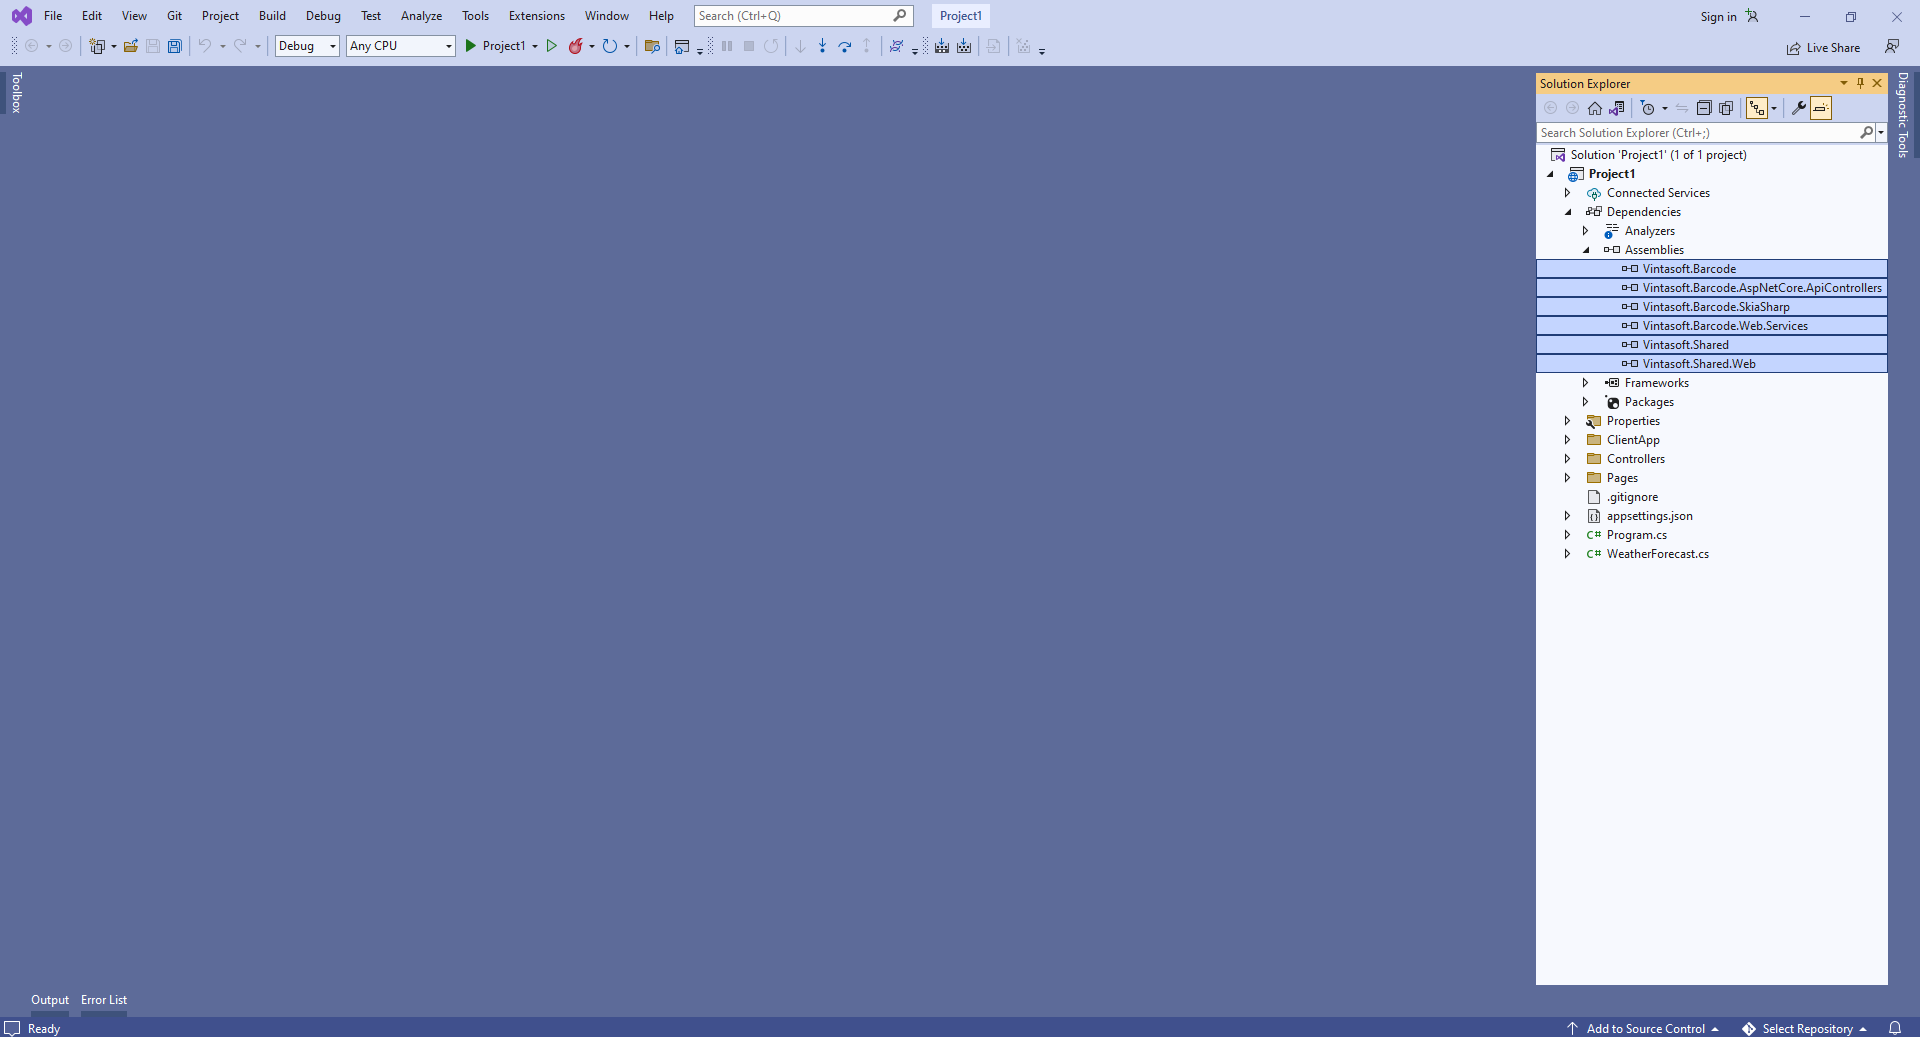
Серверная сторона: Добавьте ссылки на сборки Vintasoft в веб-приложение ASP.NET Core.
Добавьте ссылки на сборки Vintasoft.Barcode.dll, Vintasoft.Barcode.SkiaSharp.dll, Vintasoft.Shared.dll, Vintasoft.Shared.Web.dll, Vintasoft.Barcode.Web.Services.dll и Vintasoft.Barcode.AspNetCore.ApiControllers.dll из папки "<InstallPath>\VintaSoft Barcode .NET 15.3\Bin\DotNet8\AnyCPU\" в веб-приложение ASP.NET Core.
-
Серверная сторона: Создайте веб-сервис для распознавания штрих-кодов.
-
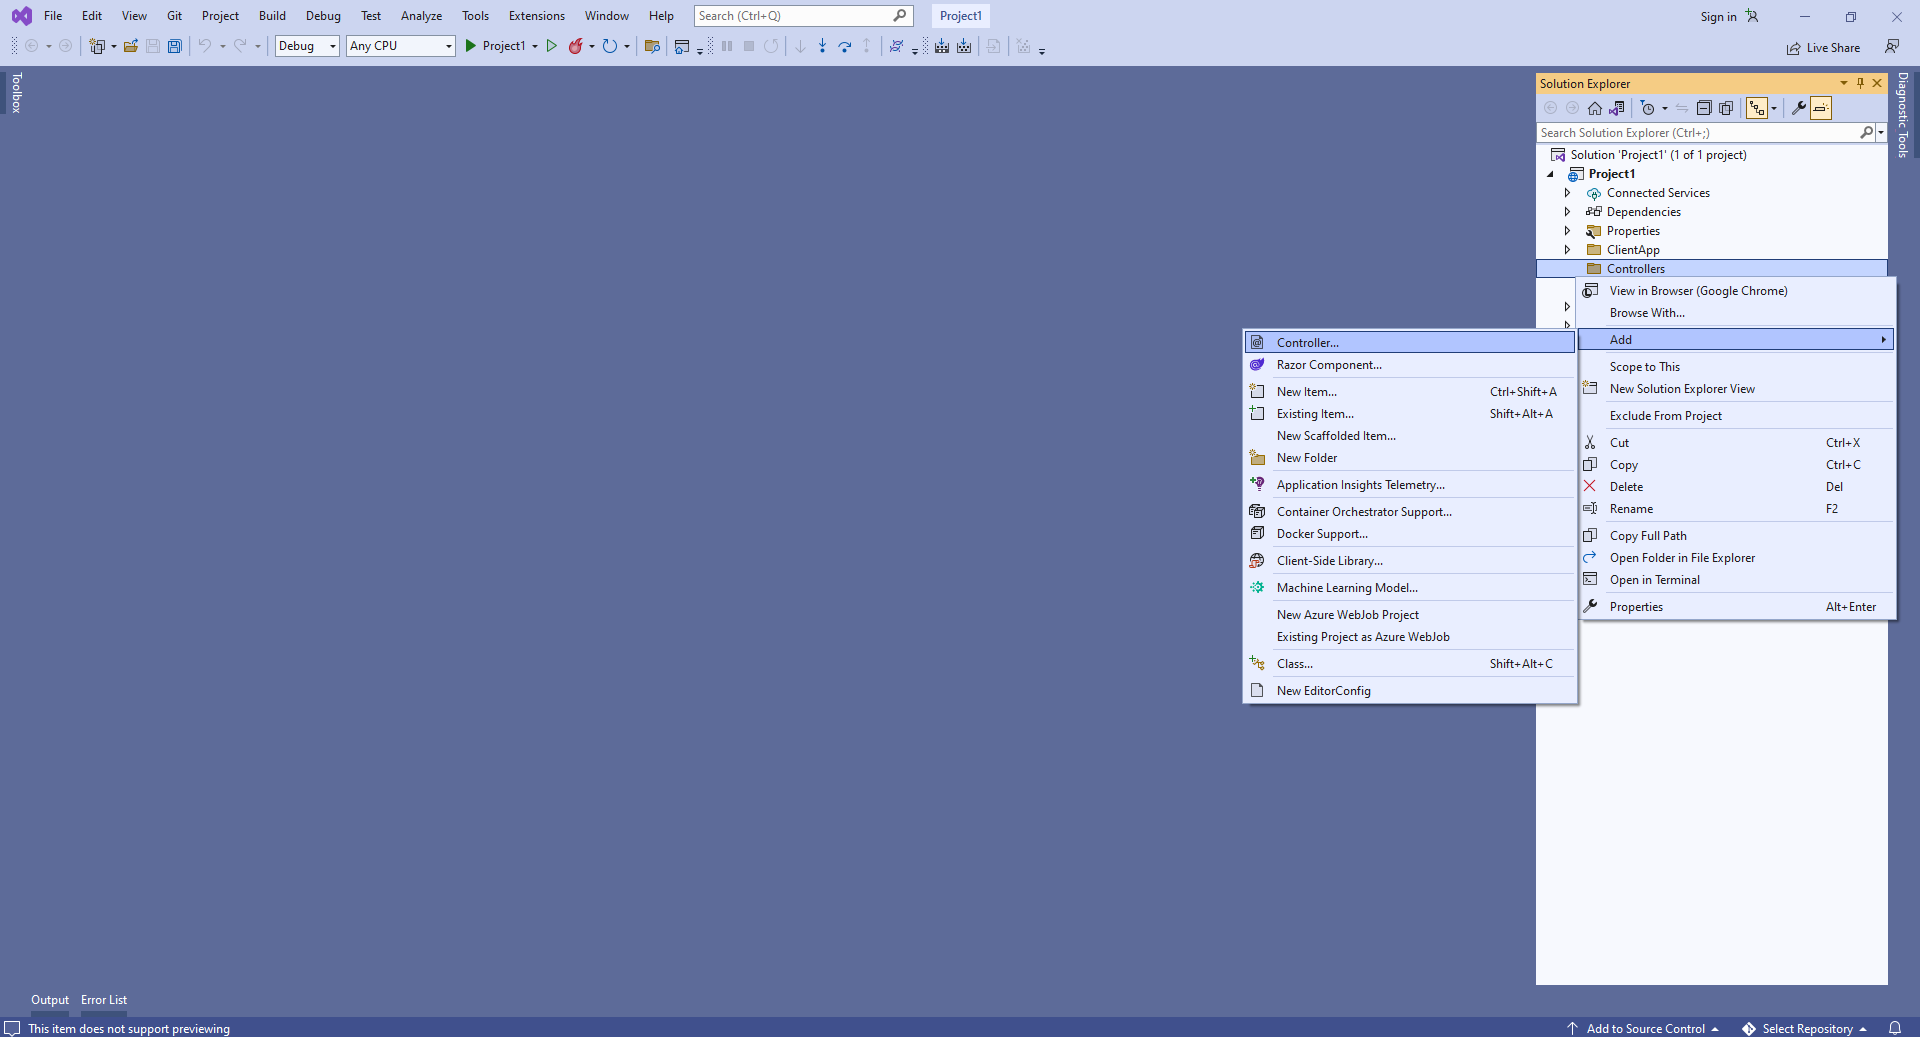
Нажмите правую кнопку мыши на папке "Controllers" и выберите "Add => Controller..." в контекстном меню
-
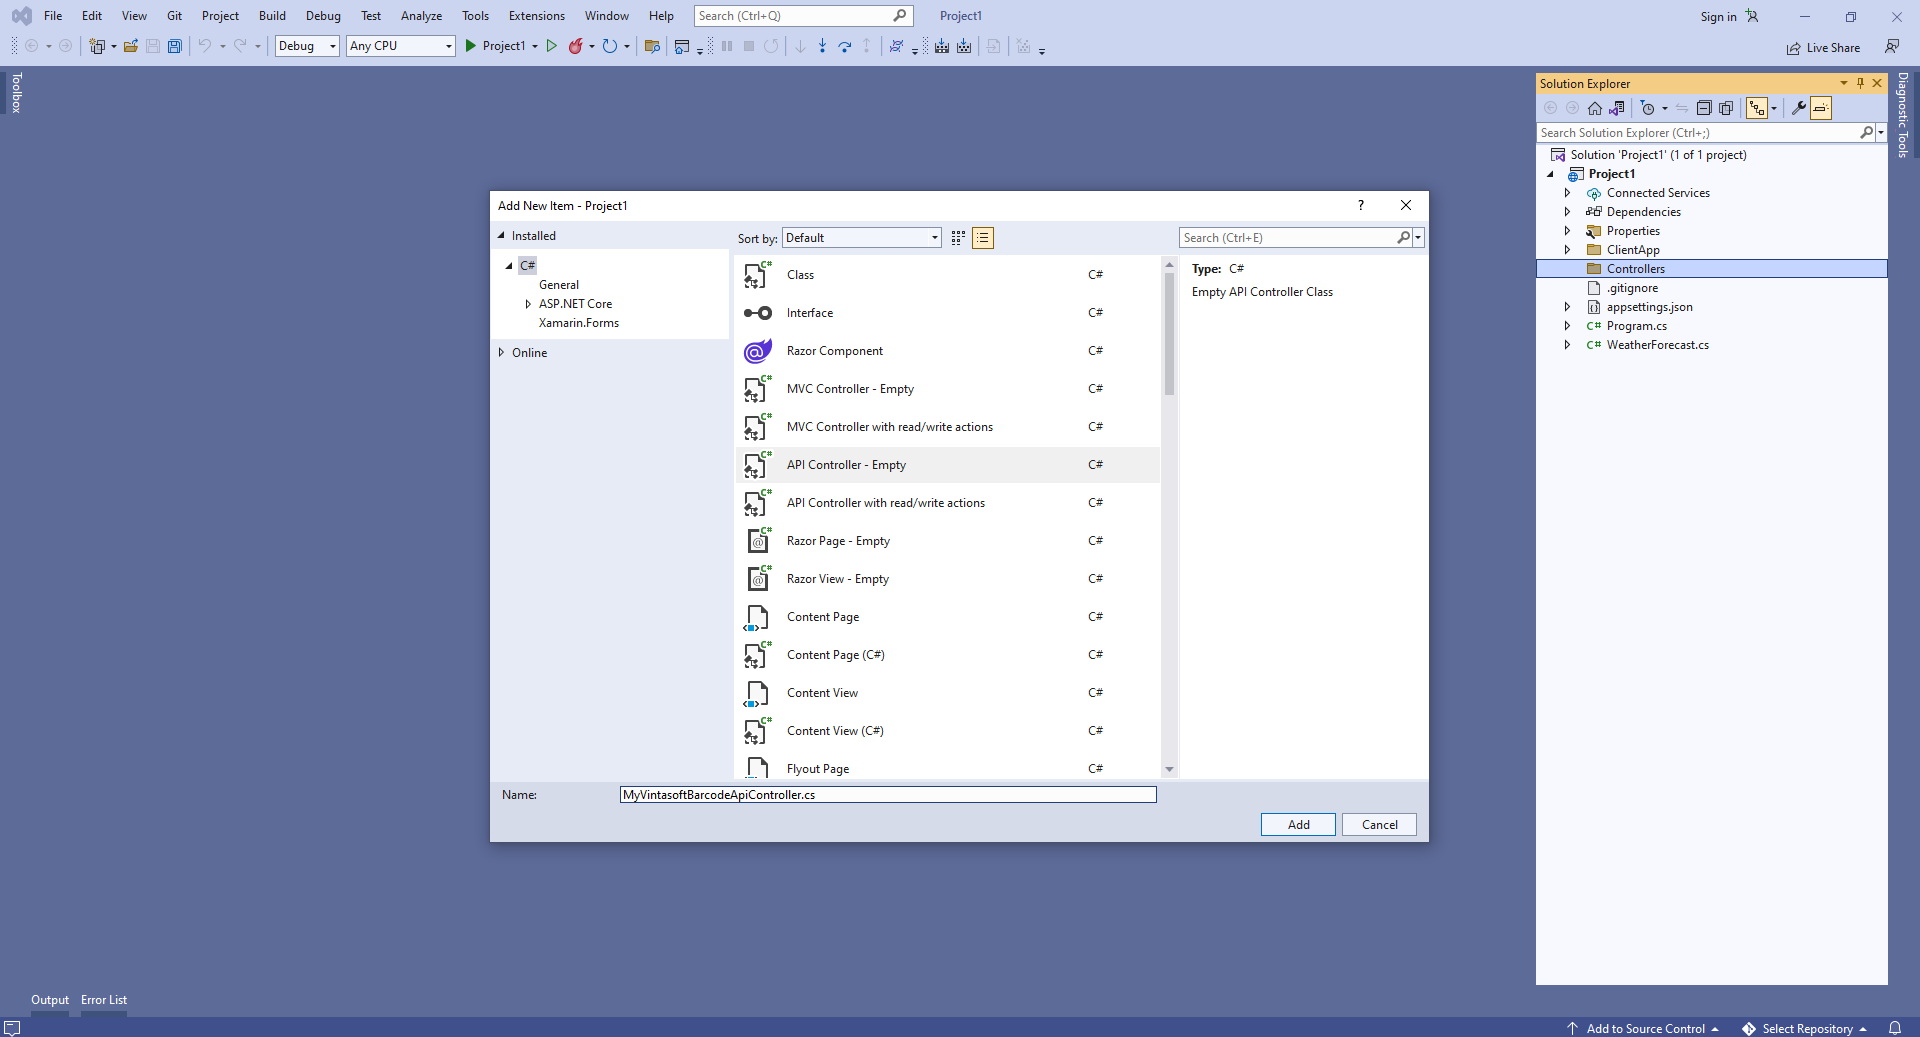
Выберите шаблон контроллера Empty API, задайте имя контроллера "MyVintasoftBarcodeApiController" и нажмите кнопку "Add"
-
Укажите, что класс MyVintasoftBarcodeApiController является производным от класса Vintasoft.Barcode.AspNetCore.ApiControllers.VintasoftBarcodeApiController
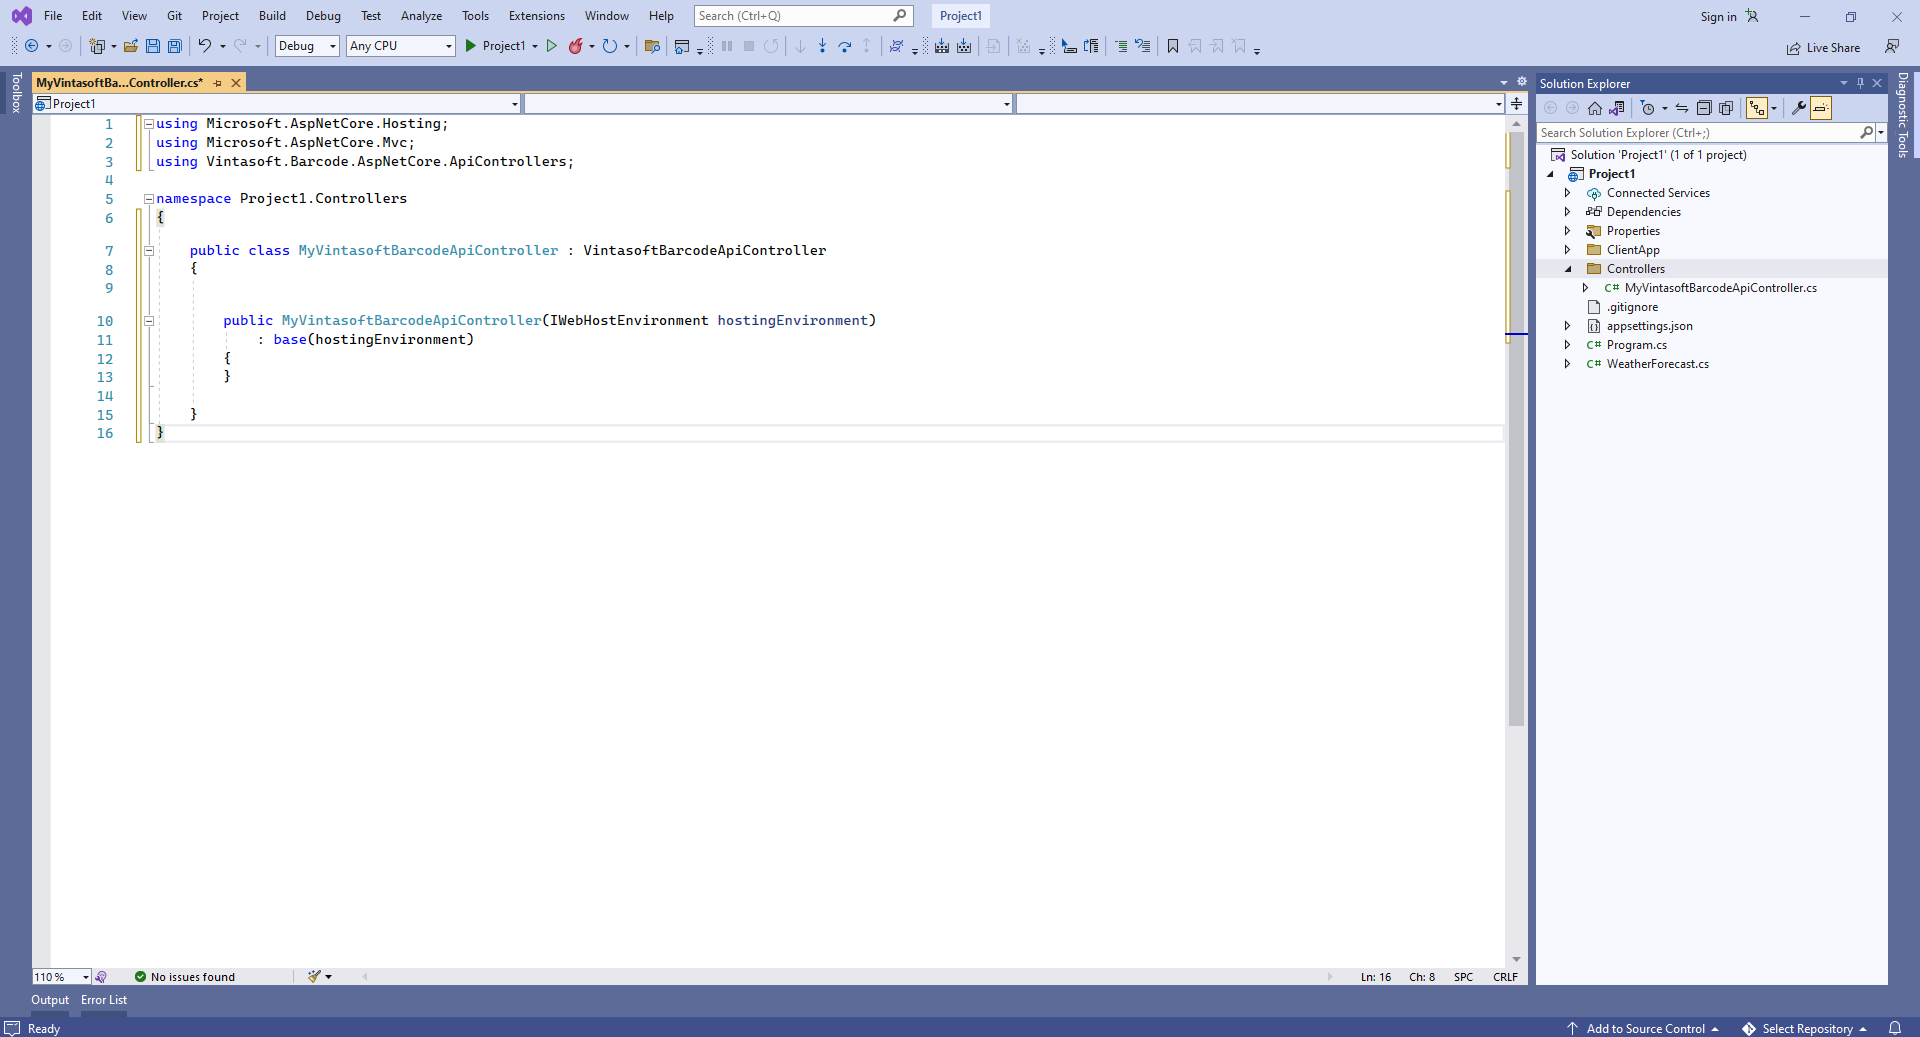
Вот исходные коды класса MyVintasoftBarcodeApiController:
using Microsoft.AspNetCore.Hosting;
using Microsoft.AspNetCore.Mvc;
using Vintasoft.Barcode.AspNetCore.ApiControllers;

namespace WebApplication1.Controllers
{
    public class MyVintasoftBarcodeApiController : VintasoftBarcodeApiController
    {

        public MyVintasoftBarcodeApiController(IWebHostEnvironment hostingEnvironment)
            : base(hostingEnvironment)
        {
        }

    }
}
-
Серверная сторона: Добавьте Newtonsoft JSON для десериализации результатов распознавания штрих-кодов.
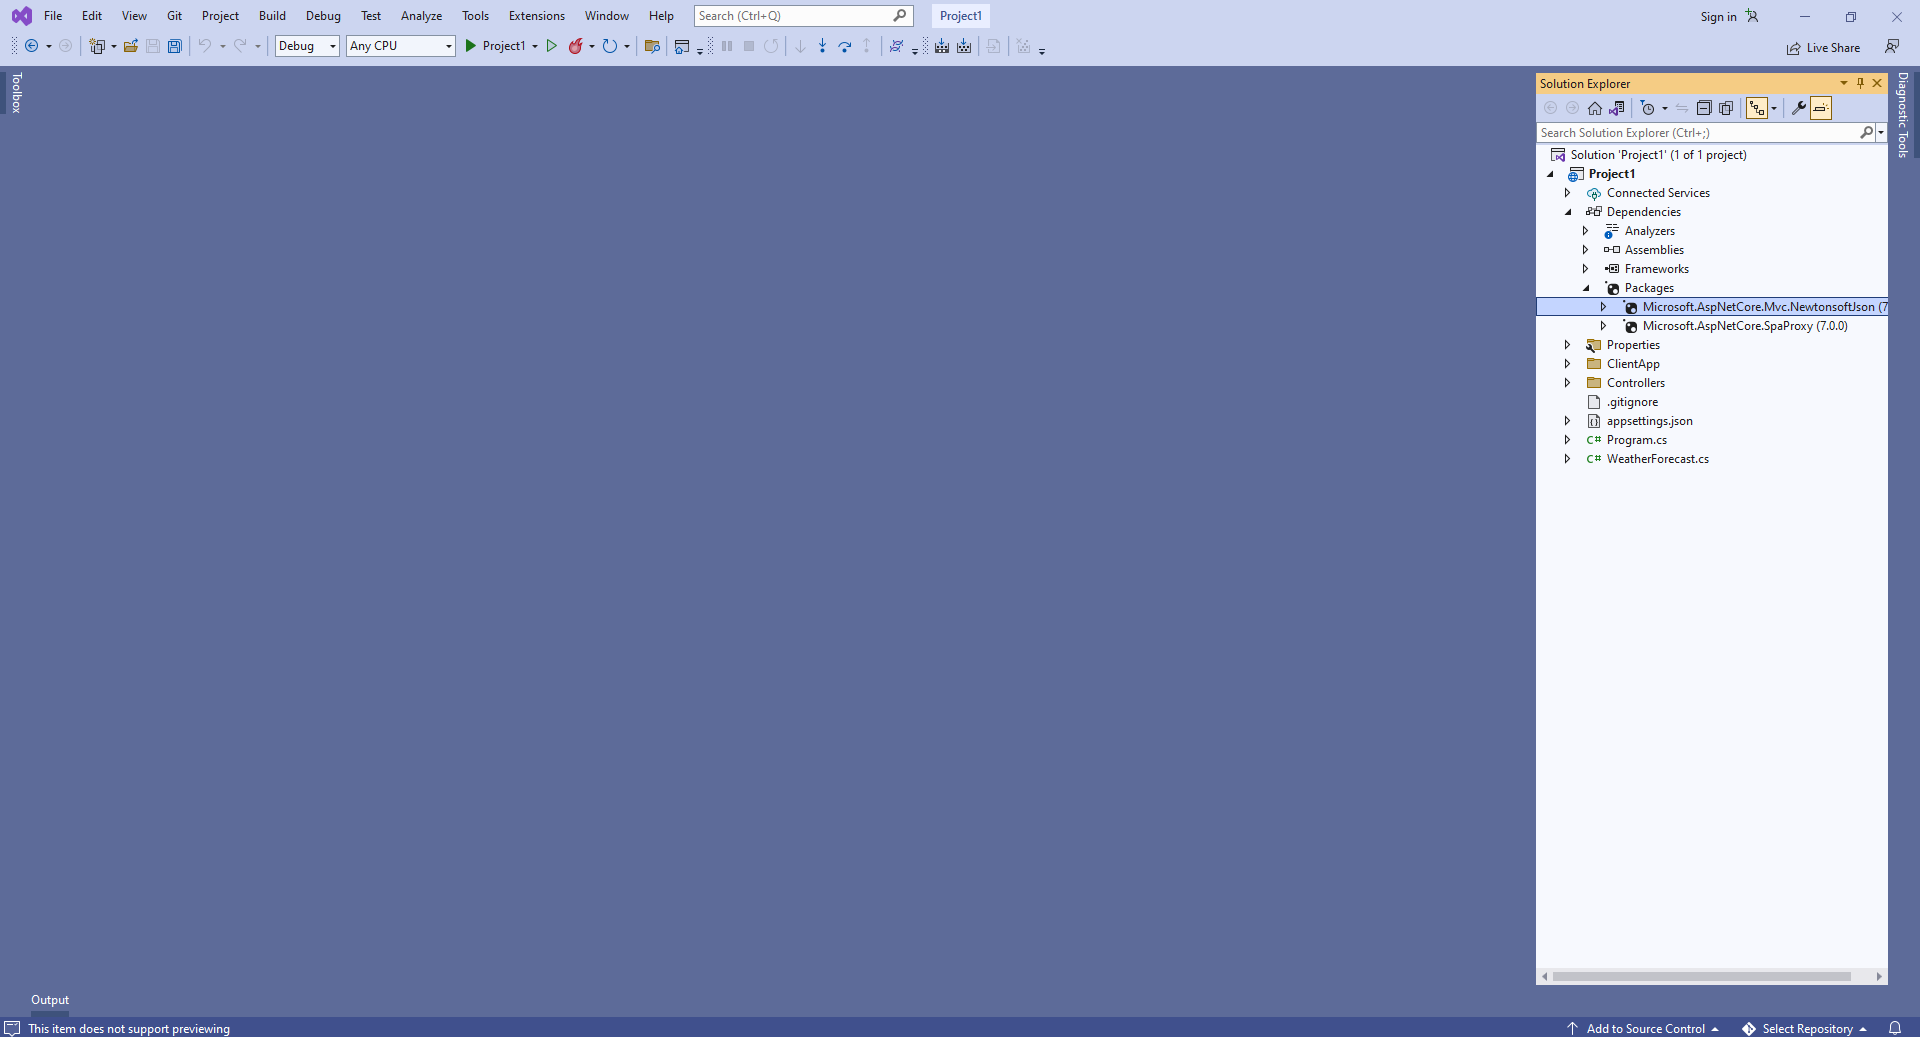
Добавьте ссылку на NuGet-пакет "Microsoft.AspNetCore.Mvc.NewtonsoftJson":
Откройте файл "Program.cs" и добавьте строку кода "services.AddControllersWithViews().AddNewtonsoftJson();". Это необходимо для корректной десериализации результатов распознавания штрих-кодов.
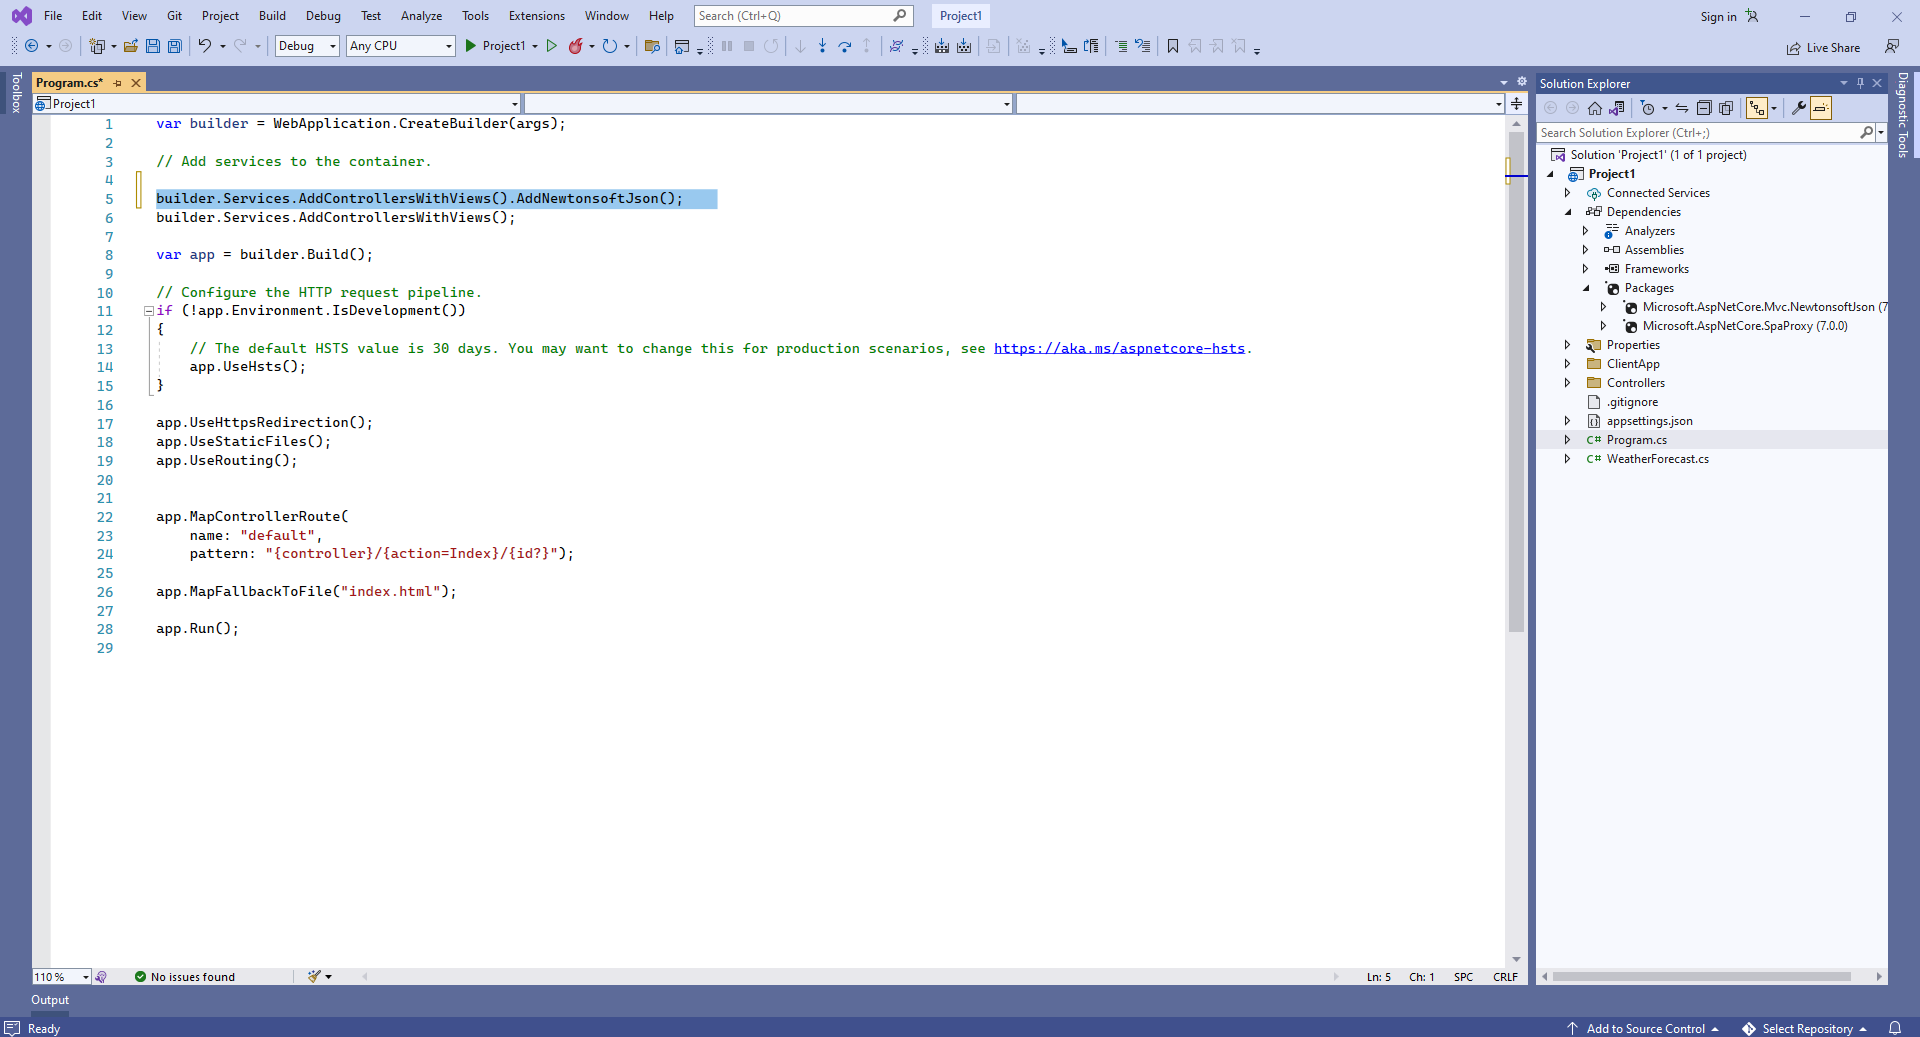
Вот исходные коды Program.cs:
var builder = WebApplication.CreateBuilder(args);

// Add services to the container.

builder.Services.AddControllersWithViews().AddNewtonsoftJson();
builder.Services.AddControllersWithViews();

var app = builder.Build();

// Configure the HTTP request pipeline.
if (!app.Environment.IsDevelopment())
{
    // The default HSTS value is 30 days. You may want to change this for production scenarios, see https://aka.ms/aspnetcore-hsts.
    app.UseHsts();
}

app.UseHttpsRedirection();
app.UseStaticFiles();
app.UseRouting();


app.MapControllerRoute(
    name: "default",
    pattern: "{controller}/{action=Index}/{id?}");

app.MapFallbackToFile("index.html");

app.Run();
Скомпилируйте проект с помощью NPM - это нужно для восстановления зависимостей проекта.
-
Клиентская сторона: Удалите файлы, которые не нужны в данной демонстрации.
Удалите директории "ClientApp\src\app\counter\", "ClientApp\src\app\fetch-data\", "ClientApp\src\app\home\", "ClientApp\src\app\nav-menu\" - эти компоненты Angular не нужны в данной демонстрации.
Удалите файлы "WeatherForecast.cs" и "Controllers\WeatherForecastController.cs" - контроллер WeatherForecast Web API не нужен в этой демонстрации.

Откройте файл "ClientApp\src\app\app.component.html" и удалите строку "<app-nav-menu></app-nav-menu>" из HTML-разметки - в этой демонстрации нам не нужно навигационное меню.
Откройте файл "ClientApp\src\app\app.module.ts" и удалите код, использующий следующие компоненты Angular: NavMenuComponent, HomeComponent, CounterComponent, FetchDataComponent - эти компоненты не нужны в данной демонстрации.
Вот исходные коды файла "app.module.ts" после обновления:
import { BrowserModule } from '@angular/platform-browser';
import { NgModule } from '@angular/core';
import { FormsModule } from '@angular/forms';
import { HttpClientModule, HTTP_INTERCEPTORS } from '@angular/common/http';
import { RouterModule } from '@angular/router';

import { AppComponent } from './app.component';

@NgModule({
  declarations: [
    AppComponent
  ],
  imports: [
    BrowserModule.withServerTransition({ appId: 'ng-cli-universal' }),
    HttpClientModule,
    FormsModule,
    RouterModule.forRoot([
    ])
  ],
  providers: [],
  bootstrap: [AppComponent]
})
export class AppModule { }
-
Клиентская сторона: Добавьте файлы JavaScript и модули TypeScript в веб-приложение ASP.NET Core.
Добавьте папку "assets" в папку "ClientApp\src\app\".
Скопируйте файлы Vintasoft.Shared.js, Vintasoft.Shared.d.ts, Vintasoft.Barcode.js и Vintasoft.Barcode.d.ts из папки "<InstallPath>\VintaSoft Barcode .NET 15.3\Bin\JavaScript\" в папку "ClientApp\src\app\assets\".
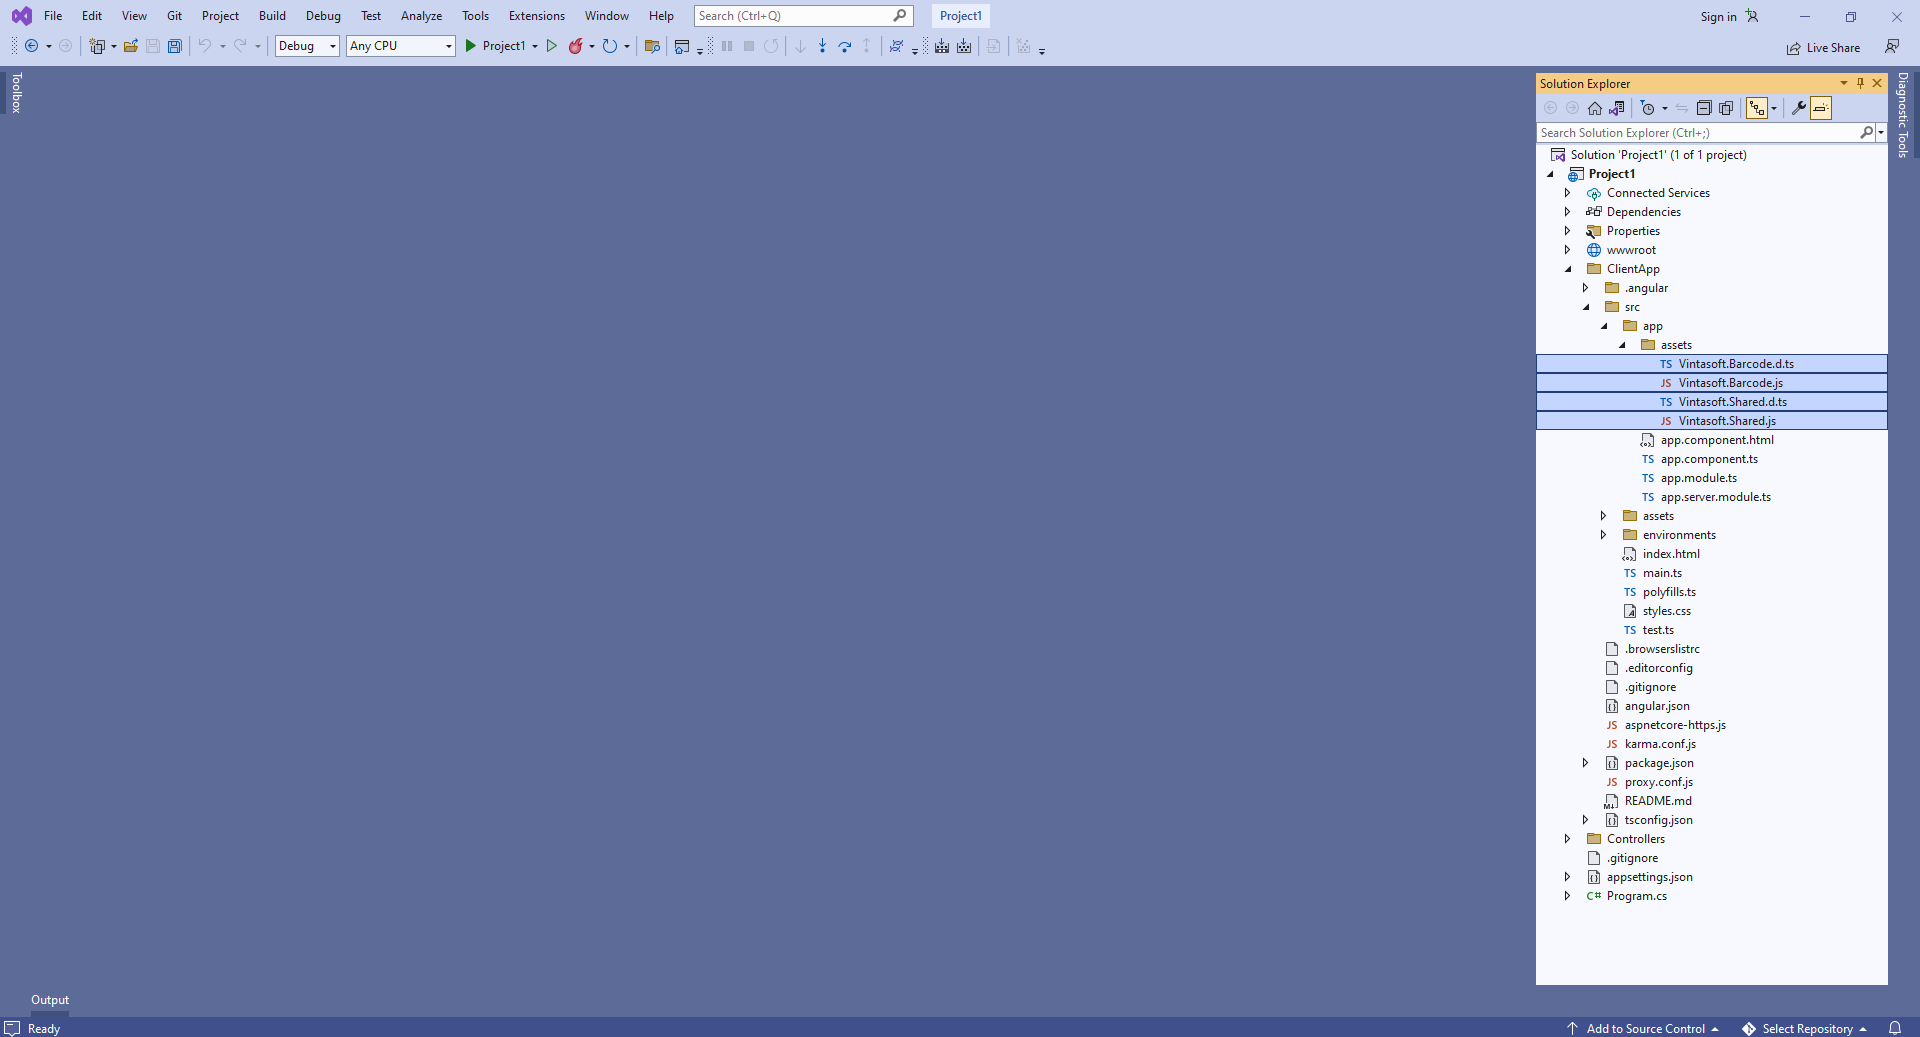
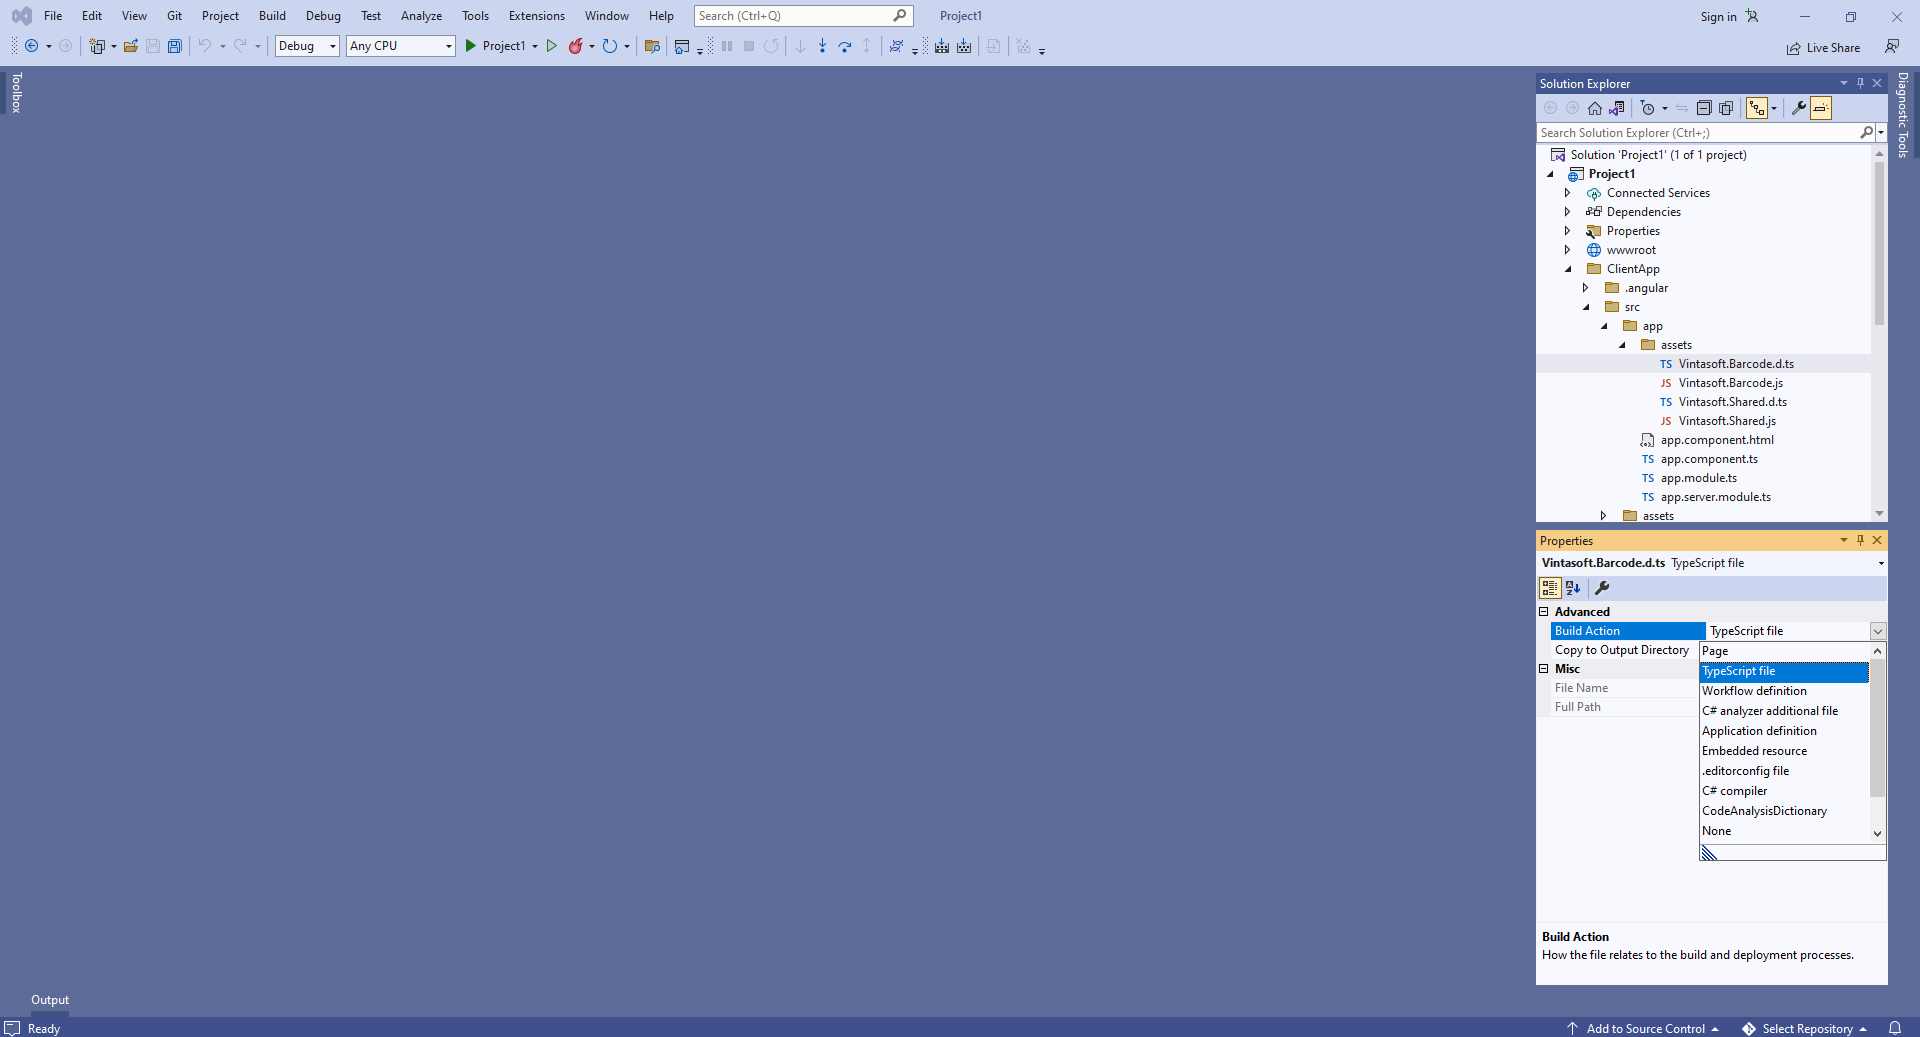
Установите "Build Action" на "TypeScript file" для файлов Vintasoft.Shared.d.ts и Vintasoft.Barcode.d.ts:
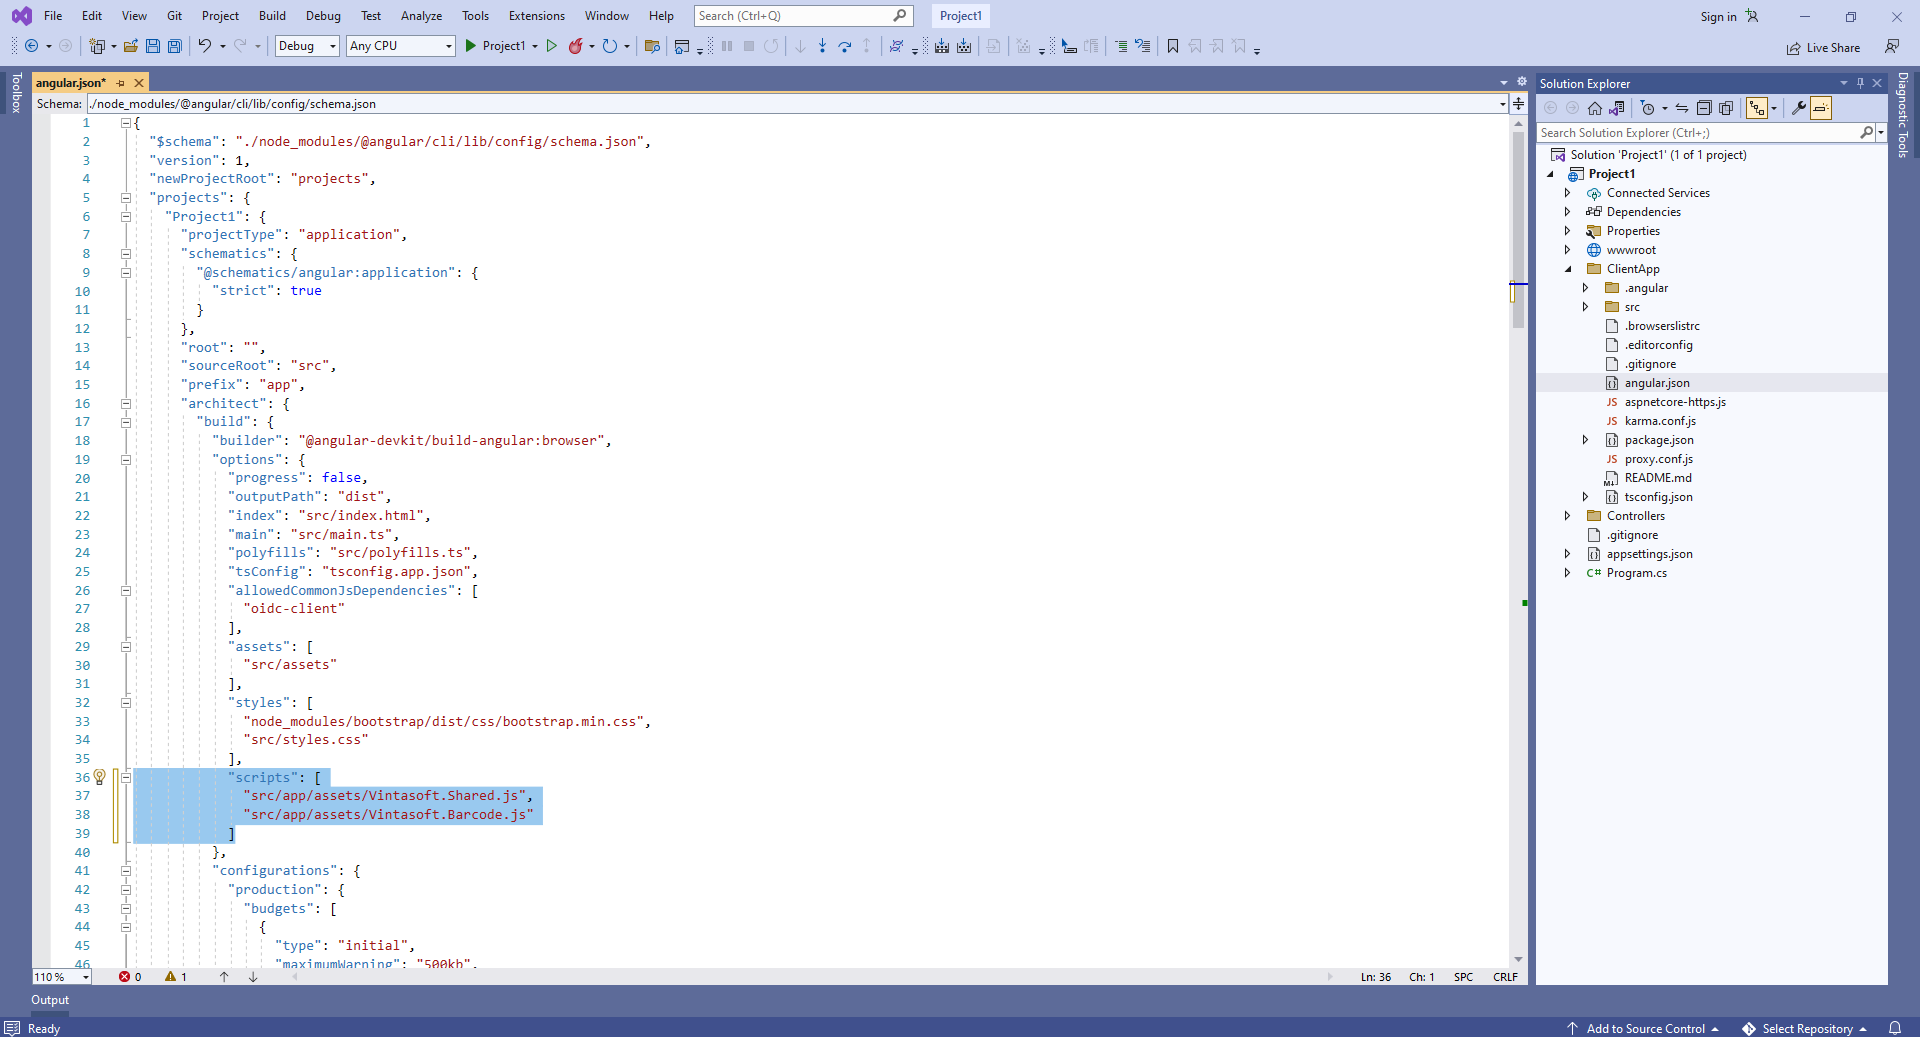
Добавьте ссылки на файлы Vintasoft JavaScript в раздел "projects => Demo => architect => build => options => scripts" в файле "ClientApp\angular.json":
...
"scripts": [
  "src/app/assets/Vintasoft.Shared.js",
  "src/app/assets/Vintasoft.Barcode.js"
]
...
-
Клиентская сторона: Создайте компонент Angular, который распознаёт штрих-коды из изображения.
-
Создайте папку "wwwroot\UploadedImageFiles\SessionID" и скопируйте в неё файл изображения со штрих-кодами "<InstallPath>VintaSoft\Barcode .NET 15.3\Images\AllSupportedBarcodes.png". Мы распознаем штрих-коды в этом изображении.
Создайте папку "ClientApp\src\app\barcode-reader-demo\".
Создайте файл "barcode-reader-demo.component.html", который будет содержать HTML-разметку компонента Angular:
- Выберите "Add => New Item..." в контекстном меню папки "ClientApp\src\app\barcode-reader-demo\" => Откроется диалог "Add new item"
- Выберите тип нового элемента "HTML Page"
- Задайте имя элемента "barcode-reader-demo.component.html"
- Нажмите на кнопку "Add" => Диалог закроется, а файл "barcode-reader-demo.component.html" будет добавлен в папку "ClientApp\src\app\barcode-reader-demo\"
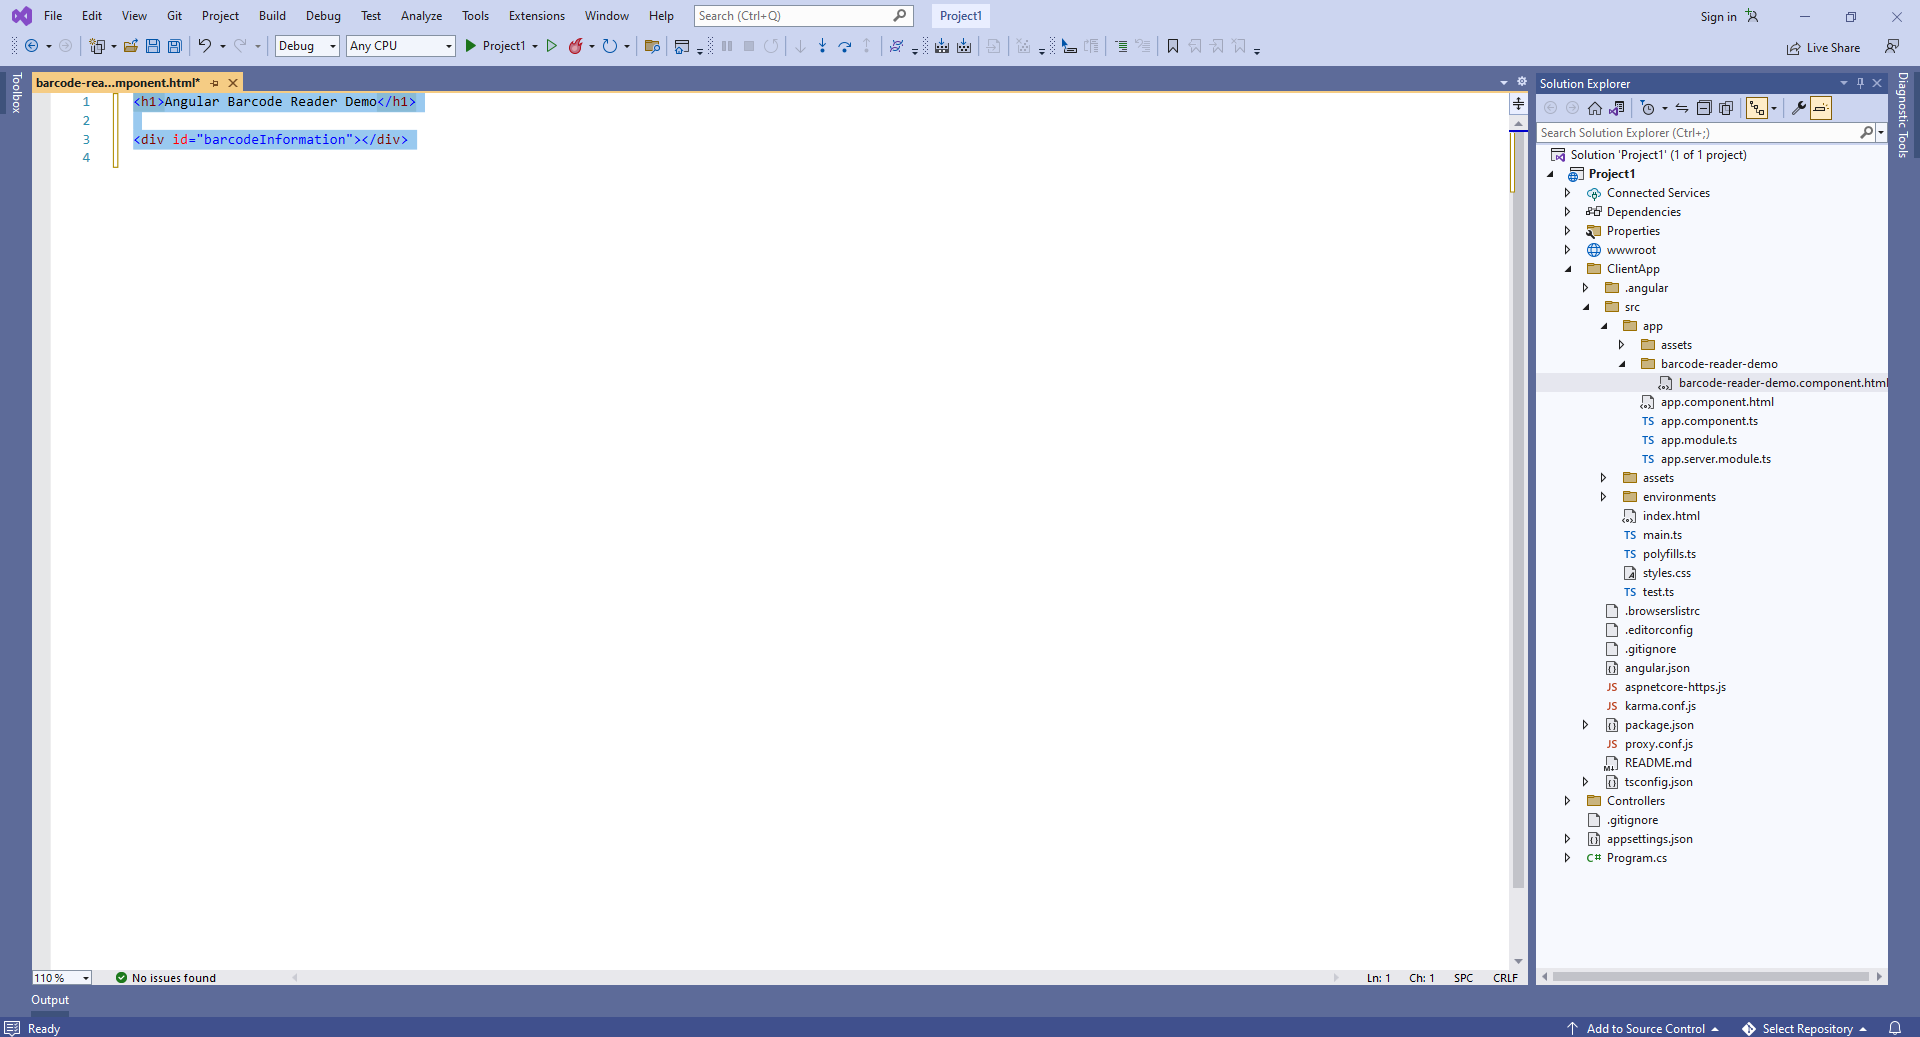
Добавьте в файл "barcode-reader-demo.component.html" HTML-разметку (заголовок страницы и элемент image, который будет отображать результат распознавания штрих-кодов):
<h1>Angular Barcode Reader Demo</h1>

<div id="barcodeInformation" ></div>
Создайте файл "barcode-reader-demo.component.ts", который будет содержать код компонента Angular:
- Выберите "Add => New Item..." в контекстном меню папки "ClientApp\src\app\barcode-reader-demo\" => Откроетстя диалог "Add new item"
- Выберите тип нового элемента "TypeScript File"
- Задайте имя элемента "barcode-reader-demo.component.ts"
- Нажмите на кнопку "Add" => Диалог закроется, а файл "barcode-reader-demo.component.ts" будет добавлен в папку "ClientApp\src\app\barcode-reader-demo\"
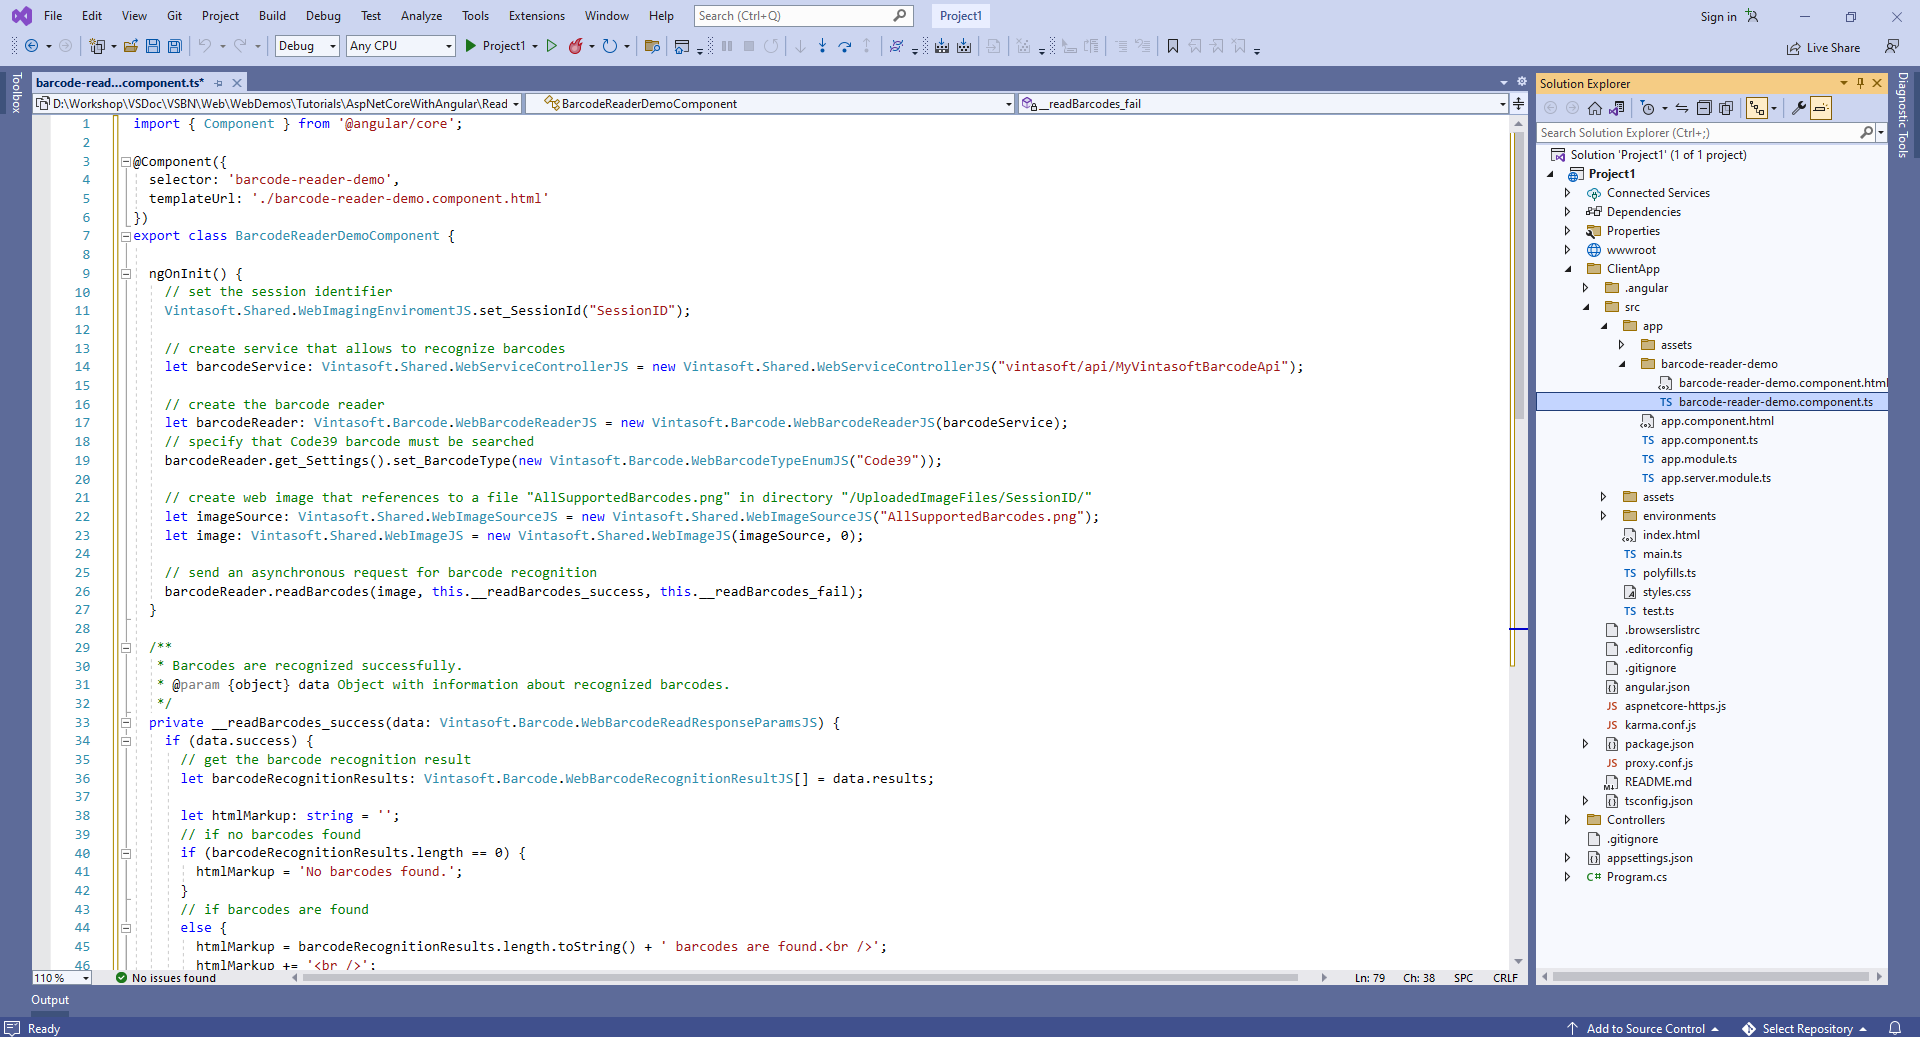
Добавьте код TypeScript в файл "barcode-reader-demo.component.cs":
import { Component } from '@angular/core';

@Component({
  selector: 'barcode-reader-demo',
  templateUrl: './barcode-reader-demo.component.html'
})
export class BarcodeReaderDemoComponent {

  ngOnInit() {
    // set the session identifier
    Vintasoft.Shared.WebImagingEnviromentJS.set_SessionId("SessionID");

    // create service that allows to recognize barcodes
    let barcodeService: Vintasoft.Shared.WebServiceControllerJS = new Vintasoft.Shared.WebServiceControllerJS("vintasoft/api/MyVintasoftBarcodeApi");

    // create the barcode reader
    let barcodeReader: Vintasoft.Barcode.WebBarcodeReaderJS = new Vintasoft.Barcode.WebBarcodeReaderJS(barcodeService);
    // specify that Code39 barcode must be searched
    barcodeReader.get_Settings().set_BarcodeType(new Vintasoft.Barcode.WebBarcodeTypeEnumJS("Code39"));

    // create web image that references to a file "AllSupportedBarcodes.png" in directory "/UploadedImageFiles/SessionID/"
    let imageSource: Vintasoft.Shared.WebImageSourceJS = new Vintasoft.Shared.WebImageSourceJS("AllSupportedBarcodes.png");
    let image: Vintasoft.Shared.WebImageJS = new Vintasoft.Shared.WebImageJS(imageSource, 0);

    // send an asynchronous request for barcode recognition
    barcodeReader.readBarcodes(image, this.__readBarcodes_success, this.__readBarcodes_fail);
  }

  /**
   * Barcodes are recognized successfully.
   * @param {object} data Object with information about recognized barcodes.
   */
  private __readBarcodes_success(data: Vintasoft.Barcode.WebBarcodeReadResponseParamsJS) {
    if (data.success) {
      // get the barcode recognition result
      let barcodeRecognitionResults: Vintasoft.Barcode.WebBarcodeRecognitionResultJS[] = data.results;

      let htmlMarkup: string = '';
      // if no barcodes found
      if (barcodeRecognitionResults.length == 0) {
        htmlMarkup = 'No barcodes found.';
      }
      // if barcodes are found
      else {
        htmlMarkup = barcodeRecognitionResults.length.toString() + ' barcodes are found.<br />';
        htmlMarkup += '<br />';

        // for each recognized barcode
        for (let i: number = 0; i < barcodeRecognitionResults.length; i++) {
          // get the barcode recognition result
          let barcodeRecognitionResult: Vintasoft.Barcode.WebBarcodeRecognitionResultJS = barcodeRecognitionResults[i];

          // output information about recognized barcode
          htmlMarkup += '[' + (i + 1) + ':' + barcodeRecognitionResult.barcodeType + ']<br />';
          htmlMarkup += '  Value: ' + barcodeRecognitionResult.value + '<br />';
          htmlMarkup += '  Confidence: ' + barcodeRecognitionResult.confidence + '<br />';
          htmlMarkup += '  Reading quality: ' + barcodeRecognitionResult.readingQuality.toFixed(2) + '<br />';
          htmlMarkup += '  Threshold: ' + barcodeRecognitionResult.threshold + '<br />';
          htmlMarkup += '  Region: ' +
            'LT=(' + barcodeRecognitionResult.region.leftTop.x + ',' + barcodeRecognitionResult.region.leftTop.y + '); ' +
            'RT=(' + barcodeRecognitionResult.region.rightTop.x + ',' + barcodeRecognitionResult.region.rightTop.y + '); ' +
            'LB=(' + barcodeRecognitionResult.region.leftBottom.x + ',' + barcodeRecognitionResult.region.leftBottom.y + '); ' +
            'RB=(' + barcodeRecognitionResult.region.rightBottom.x + ',' + barcodeRecognitionResult.region.rightBottom.y + '); ' +
            'Angle=' + barcodeRecognitionResult.region.angle.toFixed(1) + '°<br />';

          htmlMarkup += '<br />';
        }
      }

      let barcodeInformationElement: HTMLDivElement = document.getElementById("barcodeInformation") as HTMLDivElement;
      barcodeInformationElement.innerHTML = htmlMarkup;
    }
  }

  /**
   * Barcode recognition is failed.
   * @param {object} data Object with information about error.
   */
  private __readBarcodes_fail(data) {
    // show information about error
    alert(data.errorMessage);
  }
}
-
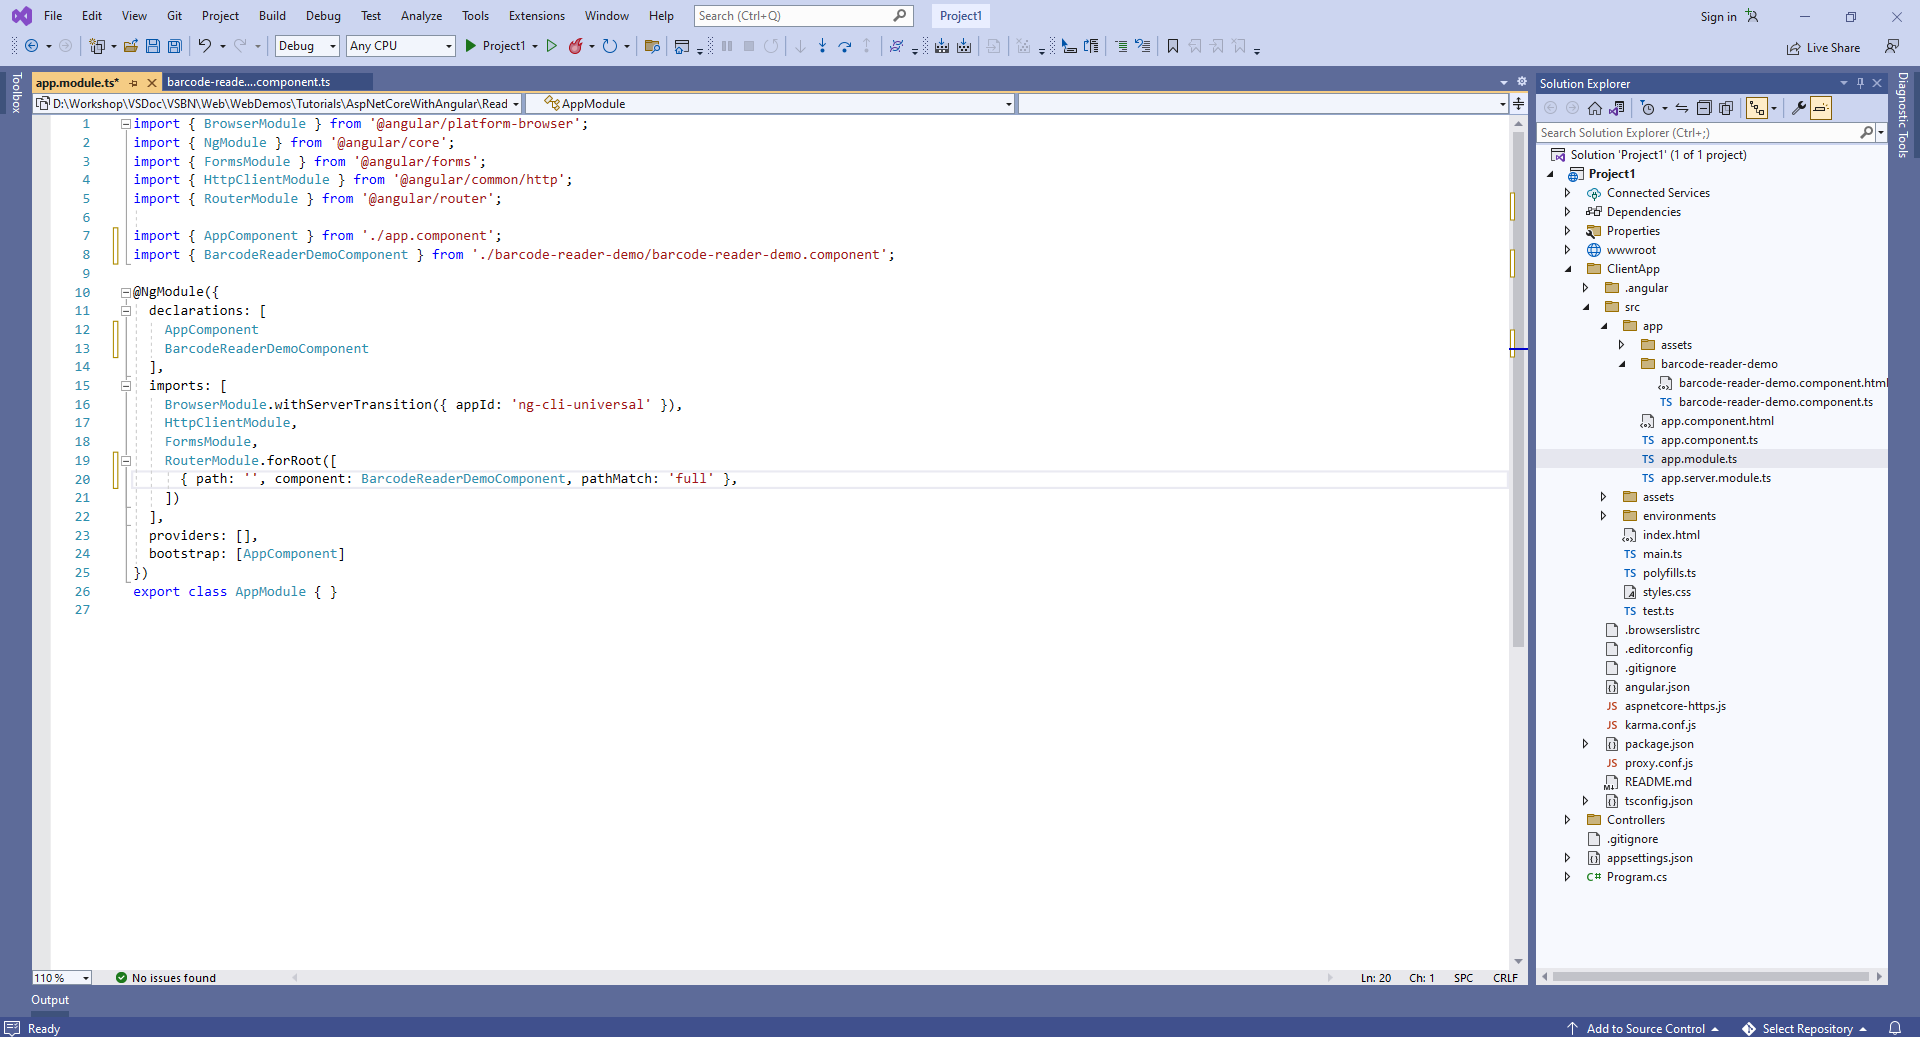
Добавьте созданный компонент Angular в модуль приложения Angular - файл "ClientApp\src\app\app.module.ts".
Вот исходные коды файла "app.module.ts" после обновления:
import { BrowserModule } from '@angular/platform-browser';
import { NgModule } from '@angular/core';
import { FormsModule } from '@angular/forms';
import { HttpClientModule, HTTP_INTERCEPTORS } from '@angular/common/http';
import { RouterModule } from '@angular/router';

import { AppComponent } from './app.component';
import { BarcodeReaderDemoComponent } from './barcode-reader-demo/barcode-reader-demo.component';

@NgModule({
  declarations: [
    AppComponent,
    BarcodeReaderDemoComponent
  ],
  imports: [
    BrowserModule.withServerTransition({ appId: 'ng-cli-universal' }),
    HttpClientModule,
    FormsModule,
    RouterModule.forRoot([
      { path: '', component: BarcodeReaderDemoComponent, pathMatch: 'full' },
    ])
  ],
  providers: [],
  bootstrap: [AppComponent]
})
export class AppModule { }
-
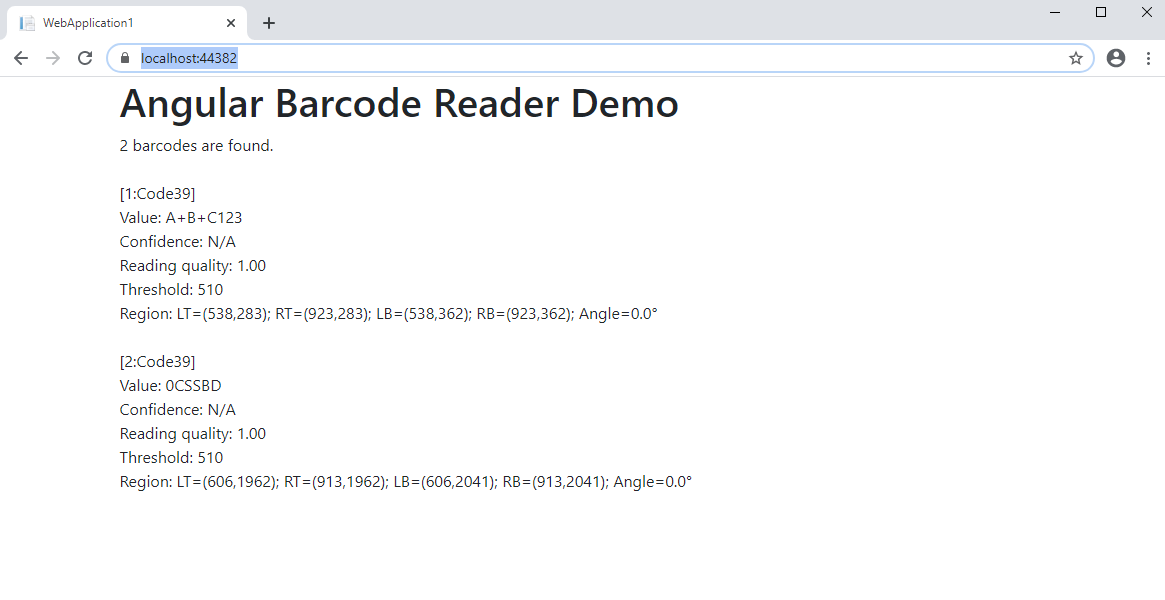
Запустите веб-приложение ASP.NET Core на Angular и оцените результат.
