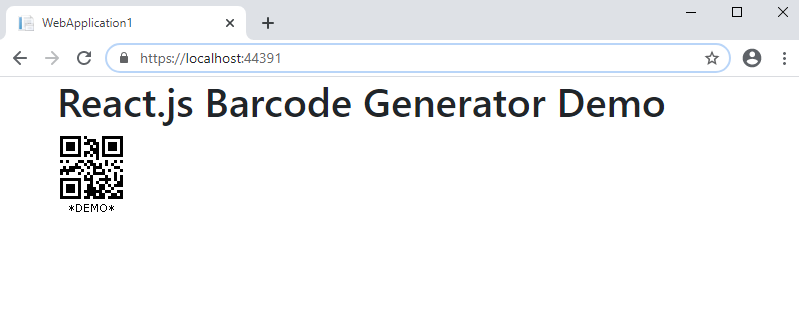
Генерация изображения штрих-кода в приложении ASP.NET Core на React.js
В этом разделе
Данное руководство демонстрирует, как создать пустое веб-приложение ASP.NET Core в Visual Studio .NET 2022 и сгенерировать изображение штрих-кода в приложении ASP.NET Core на React.js.
Вот шаги, которые необходимо выполнить:
-
Создайте пустое веб-приложение ASP.NET Core.
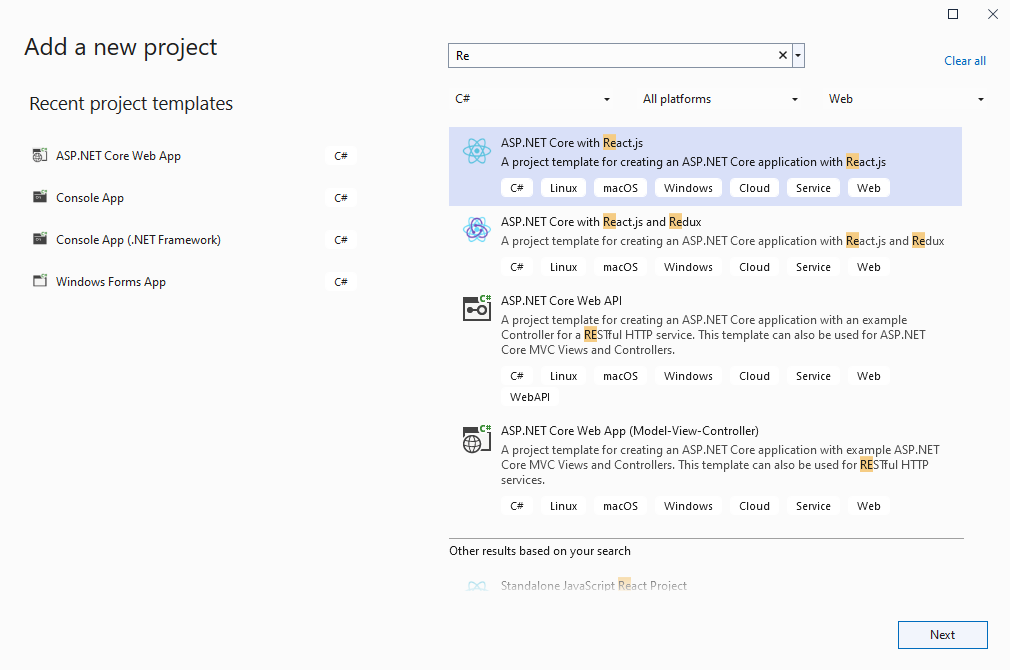
Запустите Visual Studio .NET 2022 и создайте новый проект, тип проекта - приложение ASP.NET Core на React.js:
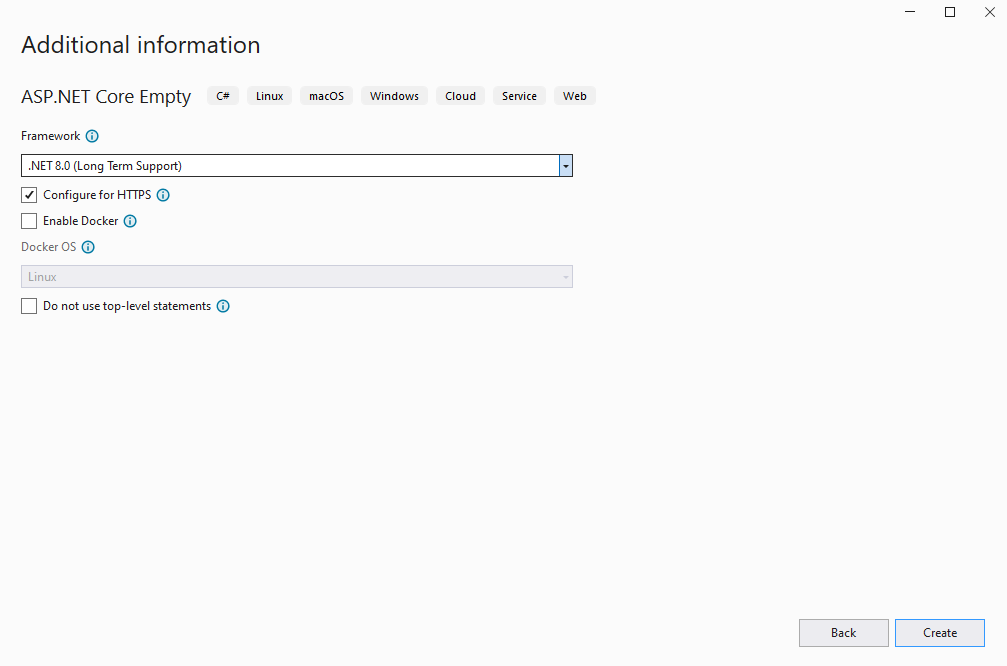
Включите в проекте использование .NET 8.0:
-
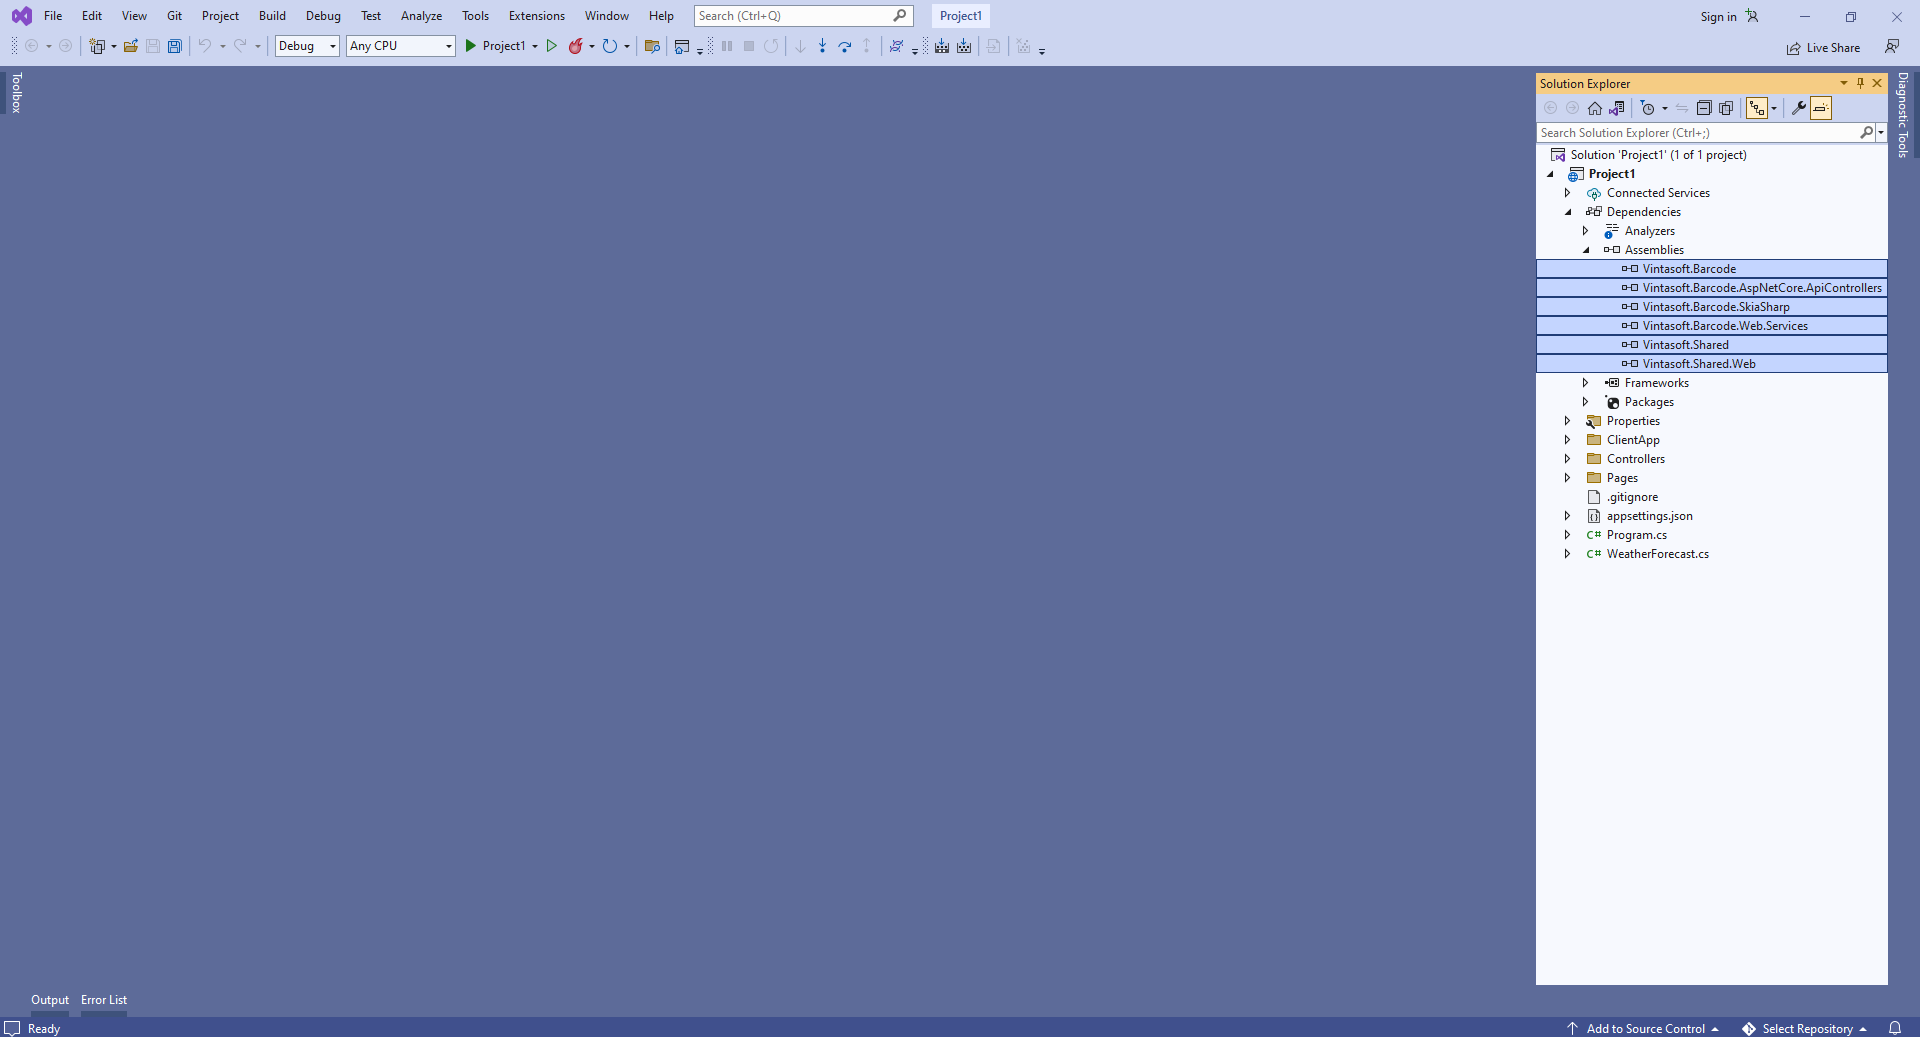
Серверная сторона: Добавьте ссылки на сборки Vintasoft в веб-приложение ASP.NET Core.
Добавьте ссылки на сборки Vintasoft.Barcode.dll, Vintasoft.Barcode.SkiaSharp.dll, Vintasoft.Shared.dll, Vintasoft.Shared.Web.dll, Vintasoft.Barcode.Web.Services.dll и Vintasoft.Barcode.AspNetCore.ApiControllers.dll из папки "<InstallPath>\VintaSoft Barcode .NET v15.0\Bin\DotNet8\AnyCPU\" в веб-приложение ASP.NET Core.
Комментарий: Ссылка на сборку Vintasoft.Barcode.SkiaSharp.dll необходима только в том случае, если SDK должен рисовать текстовое значение штрих-кода на изображении штрих-кода. Вместо сборки Vintasoft.Barcode.SkiaSharp.dll можно использовать Vintasoft.Barcode.ImageSharp.dll.
-
Серверная сторона: Добавьте контроллер Web API, который позволяет генерировать изображение штрих-кода.
-
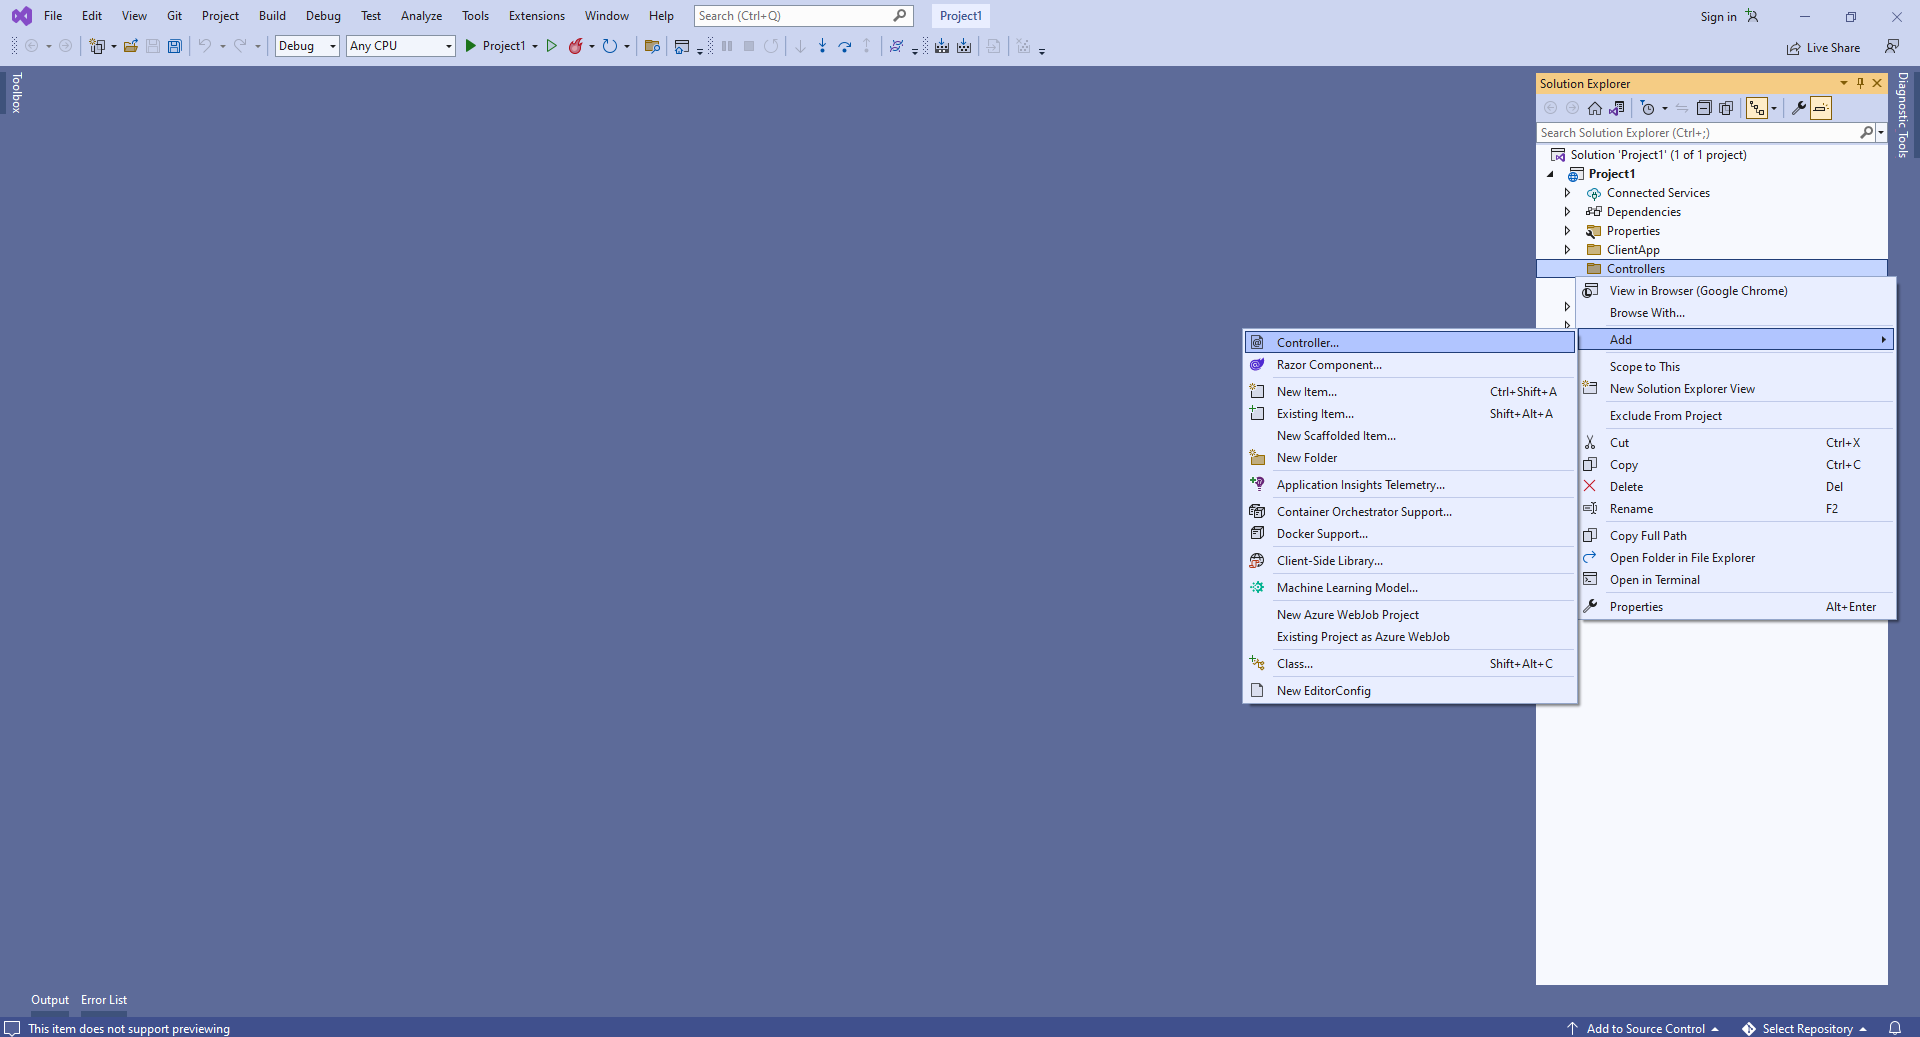
Нажмите правую кнопку мыши на папке "Controllers" и выберите "Add => Controller..." в контекстном меню
-
Выберите шаблон контроллера "Empty API", задайте имя контроллера "MyVintasoftBarcodeApiController" и нажмите кнопку "Add"

-
Укажите, что класс MyVintasoftBarcodeApiController является производным от класса Vintasoft.Barcode.AspNetCore.ApiControllers.VintasoftBarcodeApiController
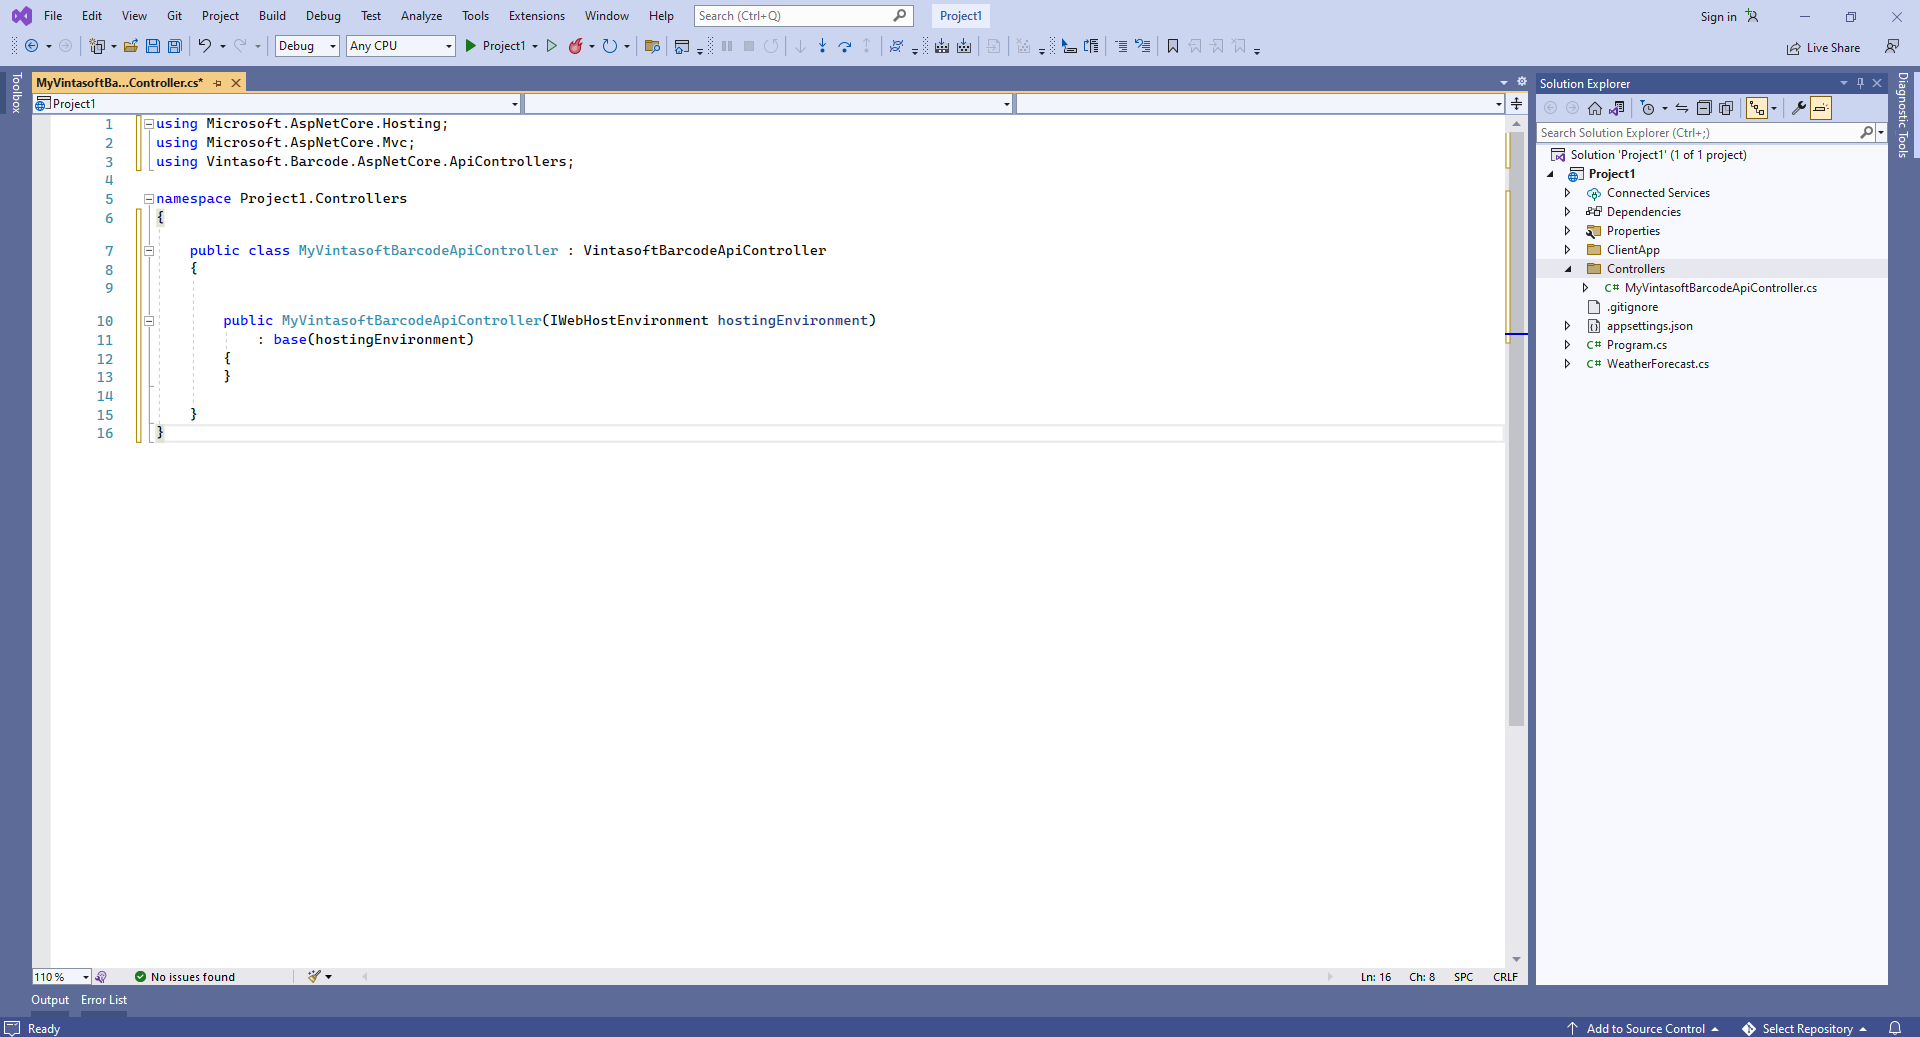
Вот исходные коды класса MyVintasoftBarcodeApiController:
using Microsoft.AspNetCore.Hosting;
using Microsoft.AspNetCore.Mvc;
using Vintasoft.Barcode.AspNetCore.ApiControllers;

namespace Project1.Controllers
{
    public class MyVintasoftBarcodeApiController : VintasoftBarcodeApiController
    {

        public MyVintasoftBarcodeApiController(IWebHostEnvironment hostingEnvironment)
            : base(hostingEnvironment)
        {
        }

    }
}
Скомпилируйте проект с помощью NPM - это нужно для восстановления зависимостей проекта.
-
Клиентская сторона: Удалите файлы, которые не нужны в данной демонстрации.
Удалите файлы "ClientApp\src\components\Counter.js", "ClientApp\src\components\FetchData.js", "ClientApp\src\components\Home.js", "ClientApp\src\components\NavMenu.js", "ClientApp\src\components\NavMenu.css" - эти компоненты React не нужны в данной демонстрации.
Удалите файлы "WeatherForecast.cs" и "Controllers\WeatherForecastController.cs" - контроллер WeatherForecast Web API не нужен в этой демонстрации.

Откройте файл "ClientApp\src\components\Layout.js" и удалите строки "import { NavMenu } from './NavMenu';" и "<NavMenu />" - в этой демонстрации нам не нужно навигационное меню.
Откройте файл "ClientApp\src\App.js" и удалите код, использующий следующие компоненты React: Home, FetchData, Counter - эти компоненты React не нужны в данной демонстрации.
Вот исходные коды файла "App.js" после обновления:
import * as React from 'react';
import { Route } from 'react-router';
import Layout from './components/Layout';

import './custom.css'

export default () => (
    <Layout>
    </Layout>
);
-
Клиентская сторона: Добавьте файлы JavaScript в веб-приложение ASP.NET Core.
-
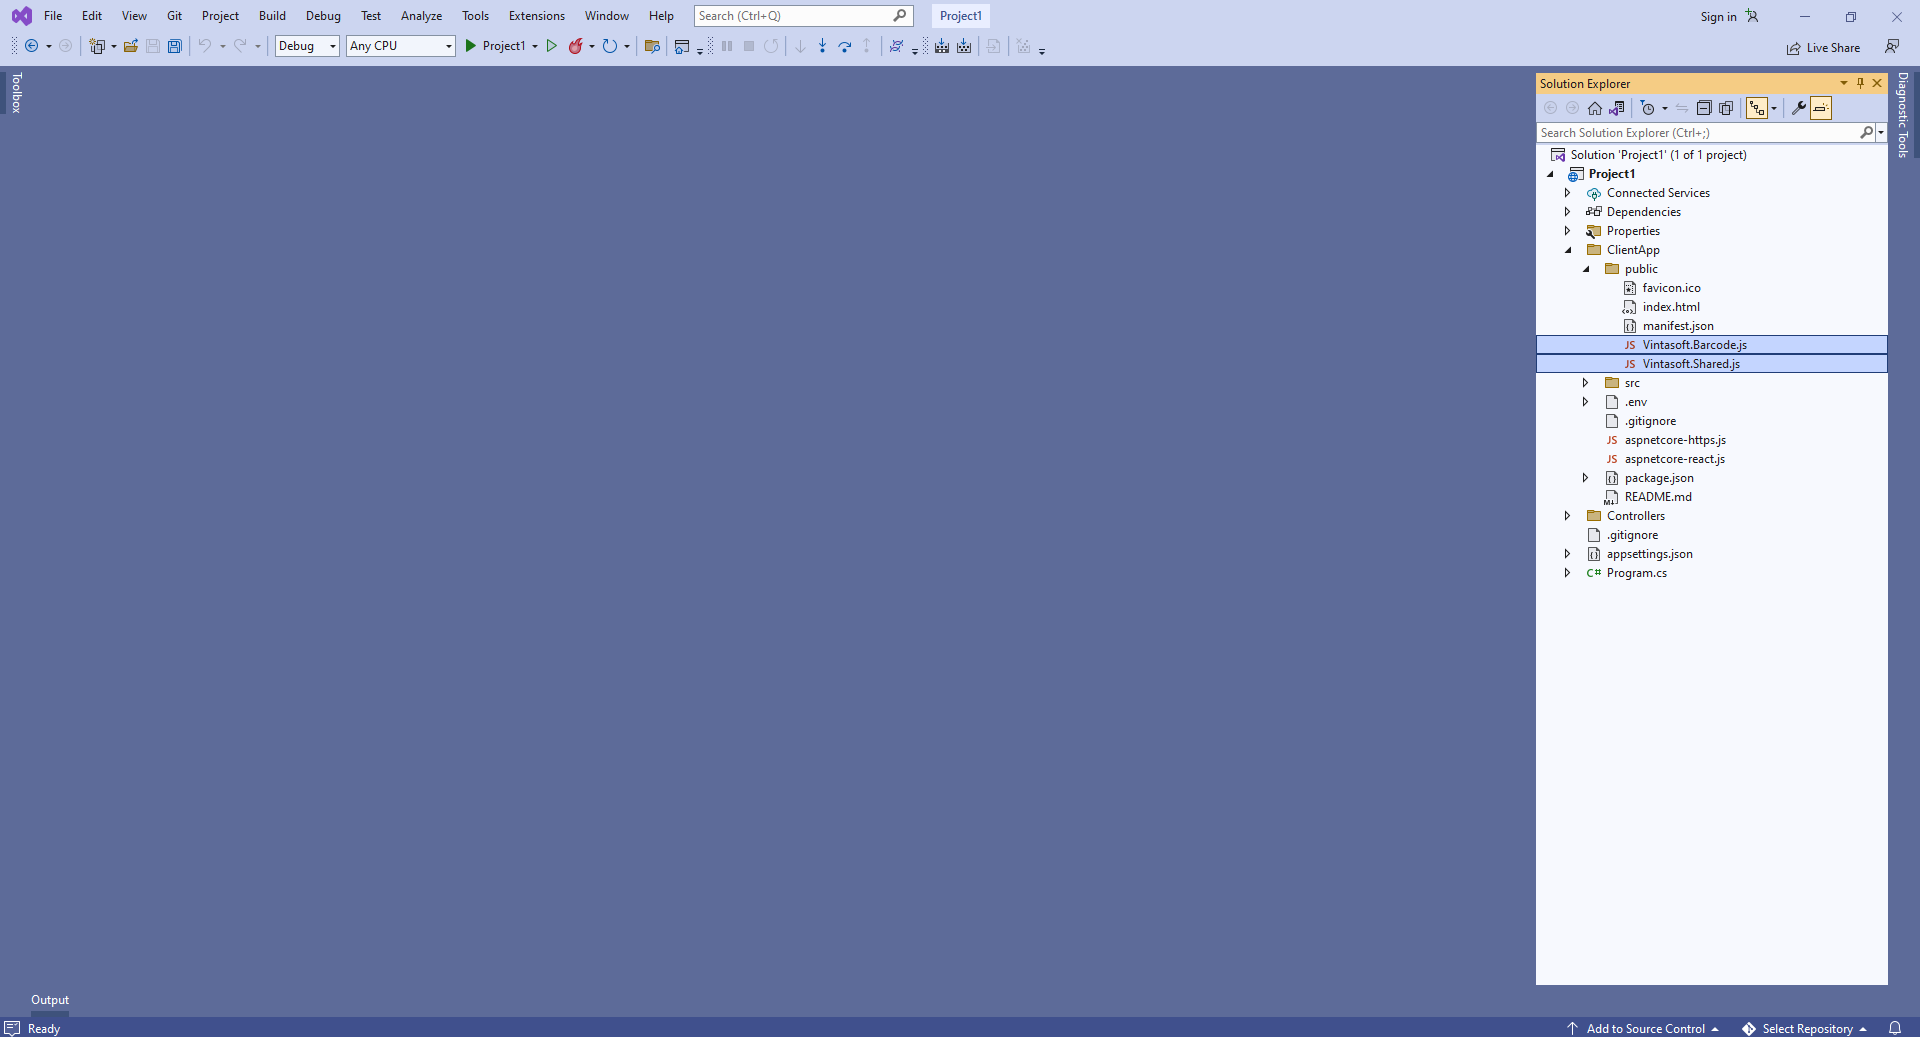
Скопируйте файлы Vintasoft.Shared.js и Vintasoft.Barcode.js из папки "<InstallPath>\VintaSoft Barcode .NET v15.0\Bin\JavaScript\" в папку "ClientApp\public\".
-
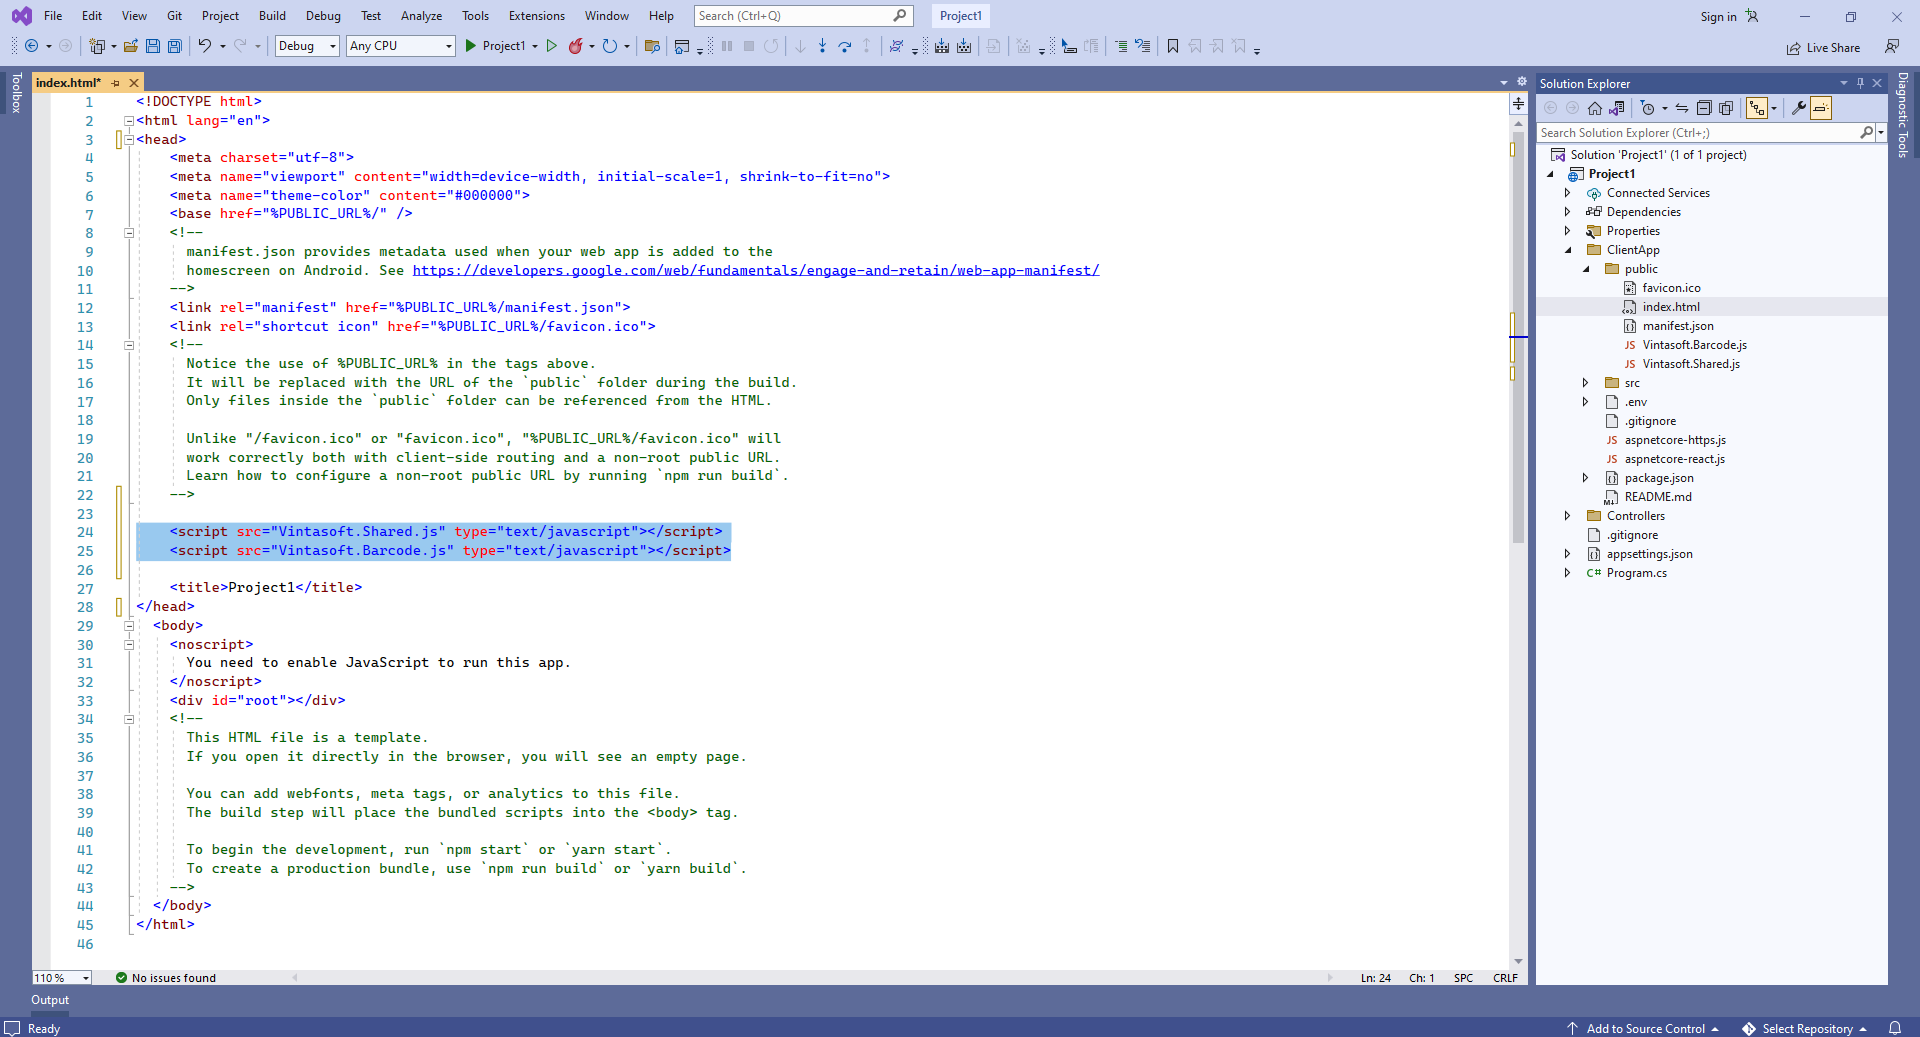
Добавьте ссылки на файлы Vintasoft JavaScript в заголовок файла "ClientApp\public\index.html":
<!DOCTYPE html>
<html lang="en">
<head>
    <meta charset="utf-8">
    <meta name="viewport" content="width=device-width, initial-scale=1, shrink-to-fit=no">
    <meta name="theme-color" content="#000000">
    <base href="%PUBLIC_URL%/" />
    <!--
      manifest.json provides metadata used when your web app is added to the
      homescreen on Android. See https://developers.google.com/web/fundamentals/engage-and-retain/web-app-manifest/
-->
    <link rel="manifest" href="%PUBLIC_URL%/manifest.json">
    <link rel="shortcut icon" href="%PUBLIC_URL%/favicon.ico">
    <!--
      Notice the use of %PUBLIC_URL% in the tags above.
      It will be replaced with the URL of the `public` folder during the build.
      Only files inside the `public` folder can be referenced from the HTML.

      Unlike "/favicon.ico" or "favicon.ico", "%PUBLIC_URL%/favicon.ico" will
      work correctly both with client-side routing and a non-root public URL.
      Learn how to configure a non-root public URL by running `npm run build`.
-->

    <script src="Vintasoft.Shared.js" type="text/javascript"></script>
    <script src="Vintasoft.Barcode.js" type="text/javascript"></script>

    <title>WebApplication1</title>
</head>
  <body>
    <noscript>
      You need to enable JavaScript to run this app.
    </noscript>
    <div id="root"></div>
    <!--
      This HTML file is a template.
      If you open it directly in the browser, you will see an empty page.

      You can add webfonts, meta tags, or analytics to this file.
      The build step will place the bundled scripts into the <body> tag.

      To begin the development, run `npm start` or `yarn start`.
      To create a production bundle, use `npm run build` or `yarn build`.
-->
  </body>
</html>
-
Клиентская сторона: Создайте компонент React.js, который генерирует и отображает изображение штрих-кода.
-
Создайте файл "BarcodeGeneratorDemo.js", который содержит исходные коды компонента React.js (класс BarcodeGeneratorDemo):
- Выберите "Add => New Item..." в контекстном меню папки "ClientApp\src\components\" => Откроется диалог "Add new item"
- Выберите тип нового элемента "JavaScript File"
- Задайте имя элемента "BarcodeGeneratorDemo.js"
- Нажмите кнопку "Add" => Диалог будет закрыт, а файл "BarcodeGeneratorDemo.js" будет добавлен в папку "ClientApp\src\components\"
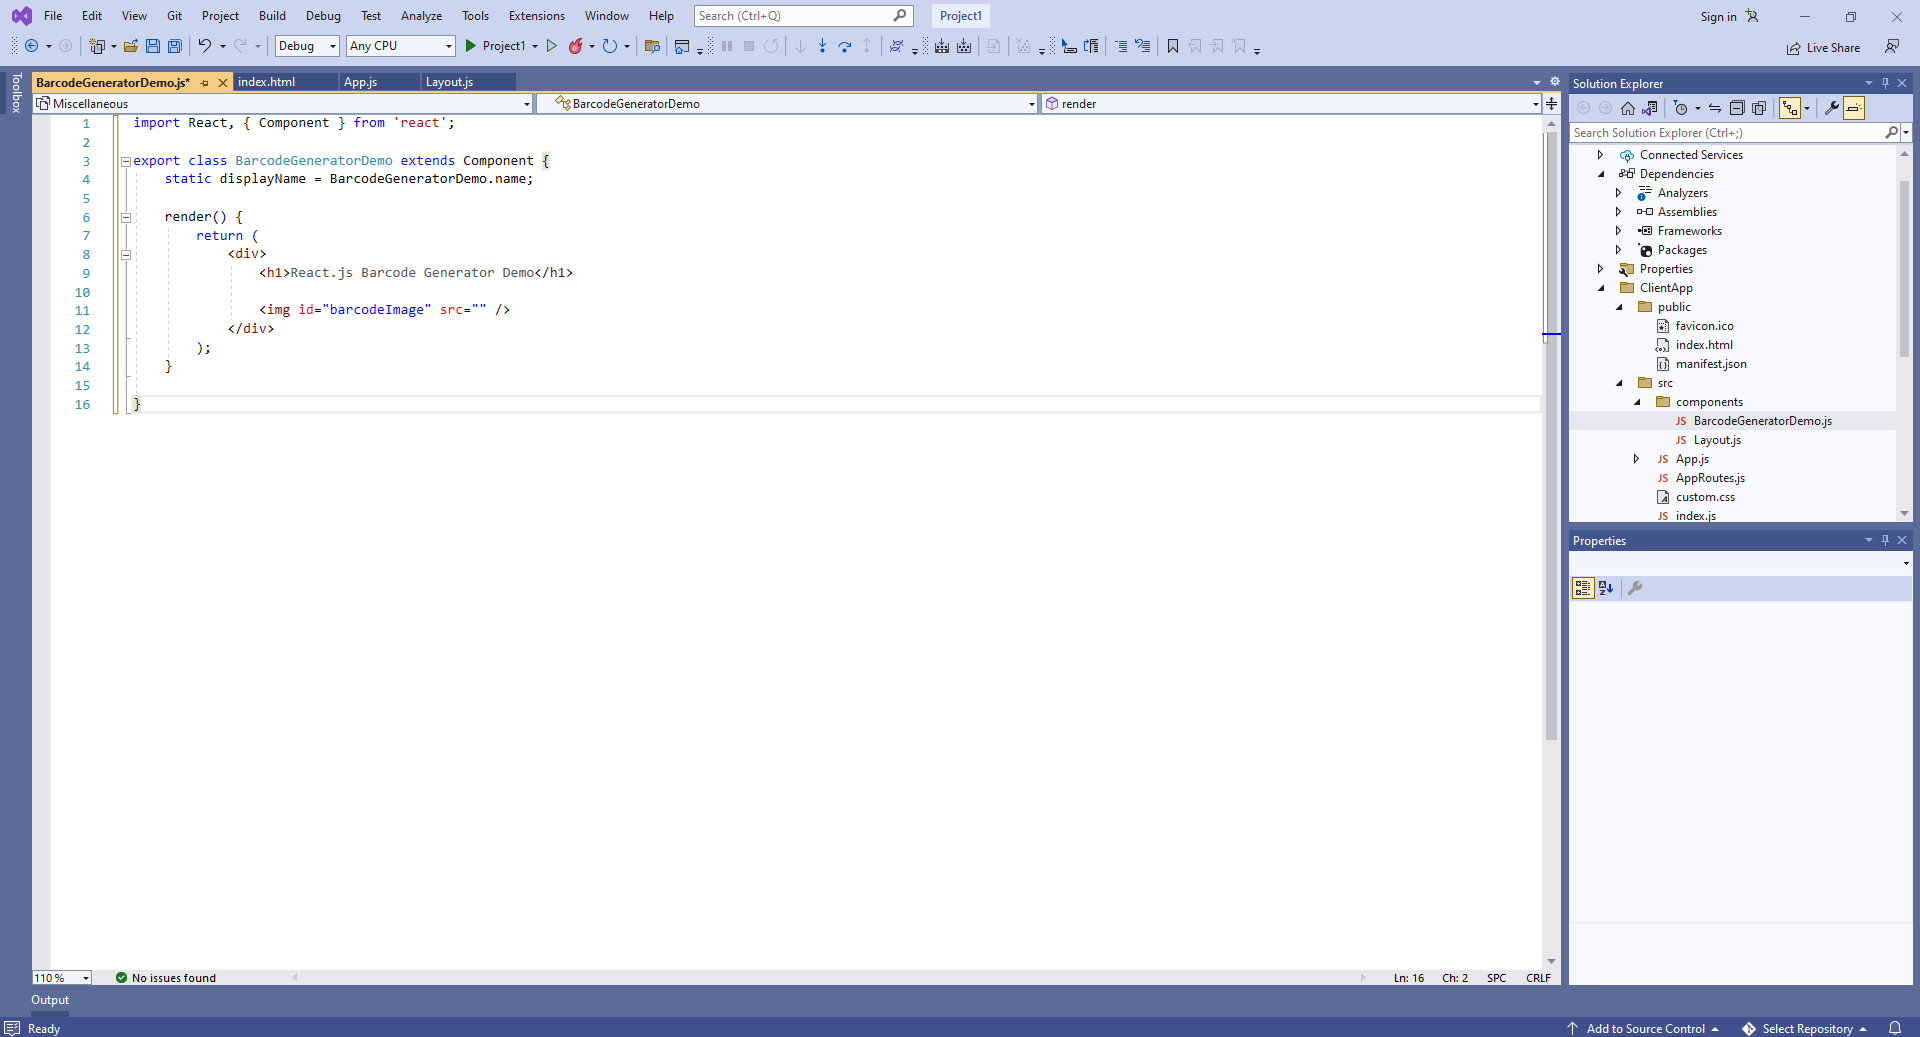
Добавьте декларацию класса BarcodeGeneratorDemo с функцией "render" (рендерит заголовок страницы и элемент image, который будет отображать сгенерированное изображение штрих-кода) в файл "BarcodeGeneratorDemo.js":
Добавьте функцию "componentDidMount" (содержит код JavaScript, который генерирует и отображает изображение штрих-кода) в класс BarcodeGeneratorDemo:
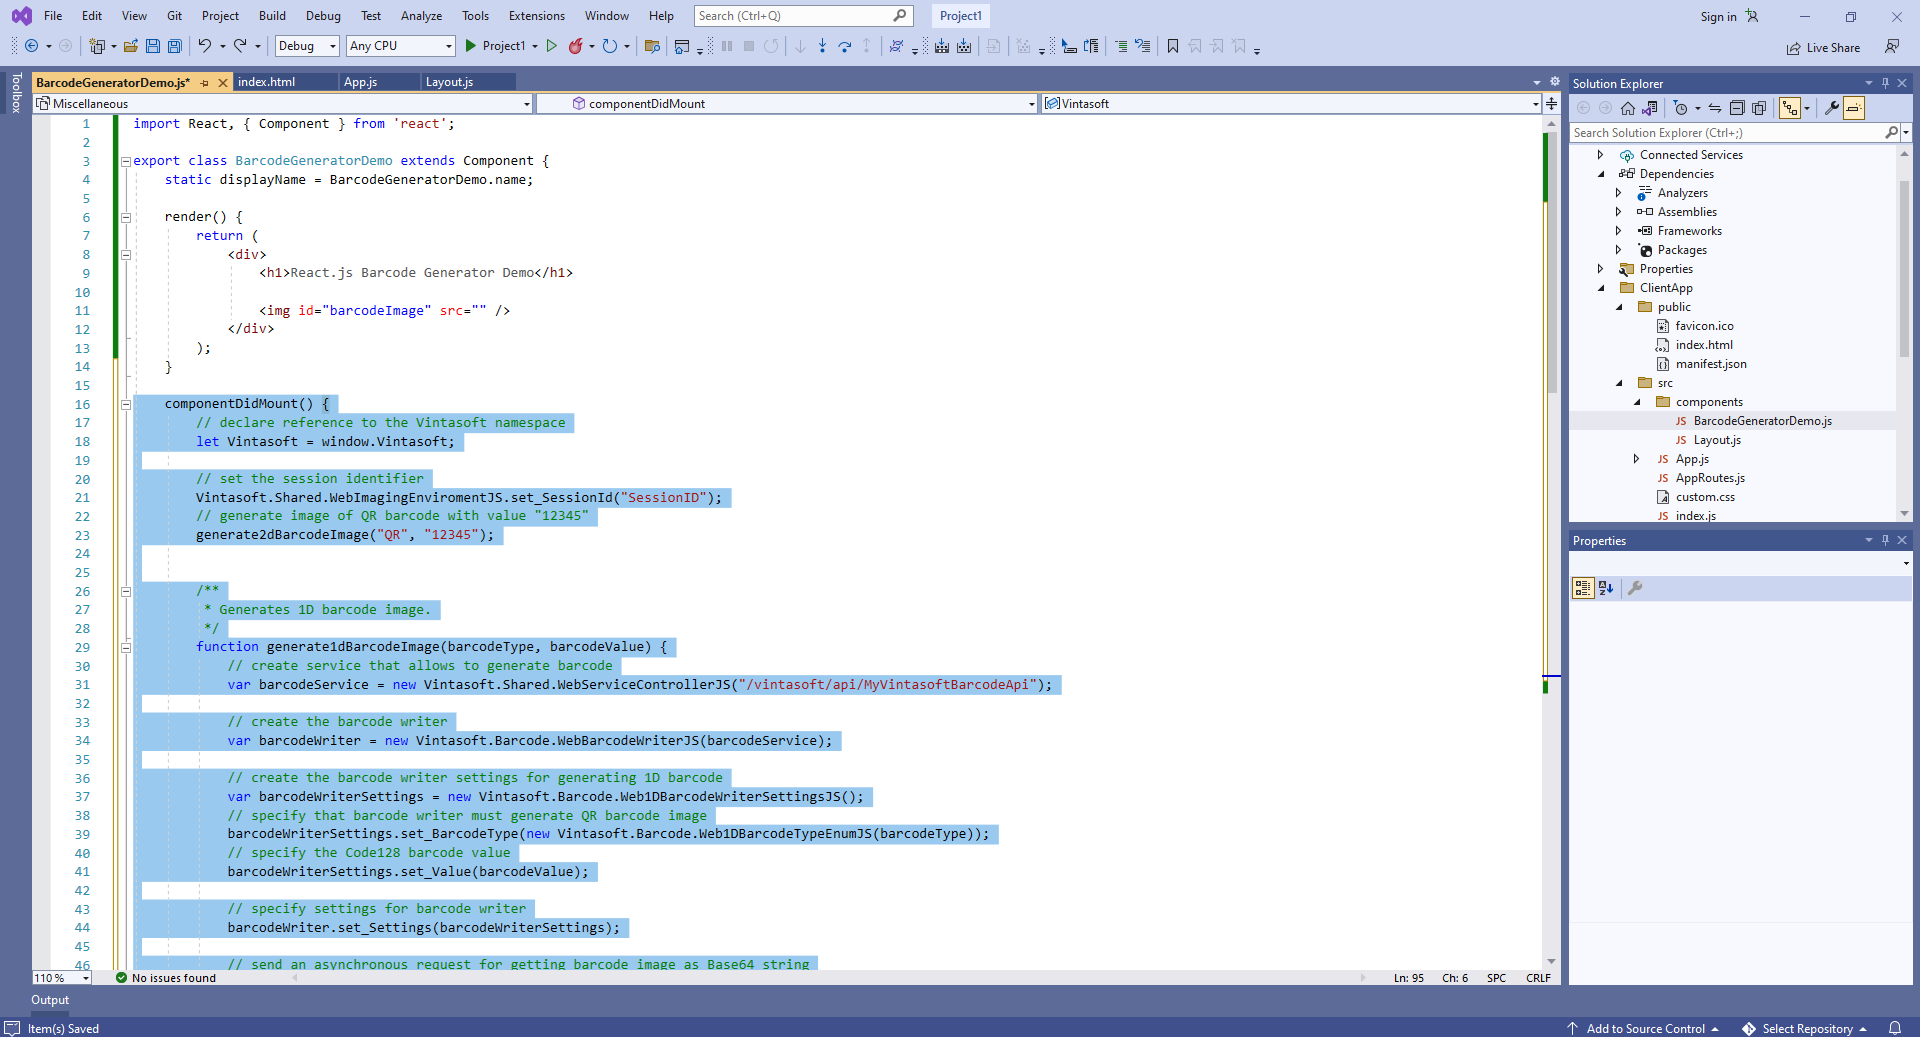
Вот код JavaScript компонента React.js (класс BarcodeGeneratorDemo):
import React, { Component } from 'react';

export class BarcodeGeneratorDemo extends Component {
    static displayName = BarcodeGeneratorDemo.name;

    render() {
        return (
            <div>
                <h1>React.js Barcode Generator Demo</h1>

                <img id="barcodeImage" src="" />
            </div>
        );
    }

    componentDidMount() {
        // declare reference to the Vintasoft namespace
        let Vintasoft = window.Vintasoft;

        // set the session identifier
        Vintasoft.Shared.WebImagingEnviromentJS.set_SessionId("SessionID");
        // generate image of QR barcode with value "12345"
        generate2dBarcodeImage("QR", "12345");


        /**
         * Generates 1D barcode image.
         */
        function generate1dBarcodeImage(barcodeType, barcodeValue) {
            // create service that allows to generate barcode
            var barcodeService = new Vintasoft.Shared.WebServiceControllerJS("/vintasoft/api/MyVintasoftBarcodeApi");

            // create the barcode writer
            var barcodeWriter = new Vintasoft.Barcode.WebBarcodeWriterJS(barcodeService);

            // create the barcode writer settings for generating 1D barcode
            var barcodeWriterSettings = new Vintasoft.Barcode.Web1DBarcodeWriterSettingsJS();
            // specify that barcode writer must generate QR barcode image
            barcodeWriterSettings.set_BarcodeType(new Vintasoft.Barcode.Web1DBarcodeTypeEnumJS(barcodeType));
            // specify the Code128 barcode value
            barcodeWriterSettings.set_Value(barcodeValue);

            // specify settings for barcode writer
            barcodeWriter.set_Settings(barcodeWriterSettings);

            // send an asynchronous request for getting barcode image as Base64 string
            barcodeWriter.getBarcodeAsBase64Image(__writeBarcode_success, __writeBarcode_failed);
        }

        /**
         * Generates 2D barcode image.
         */
        function generate2dBarcodeImage(barcodeType, barcodeValue) {
            // create web service that allows to generate barcode
            var barcodeService = new Vintasoft.Shared.WebServiceControllerJS("/vintasoft/api/MyVintasoftBarcodeApi");

            // create the barcode writer
            var barcodeWriter = new Vintasoft.Barcode.WebBarcodeWriterJS(barcodeService);

            // create the barcode writer settings for generating 2D barcode
            var barcodeWriterSettings = new Vintasoft.Barcode.Web2DBarcodeWriterSettingsJS();
            // specify that barcode writer must generate QR barcode image
            barcodeWriterSettings.set_BarcodeType(new Vintasoft.Barcode.Web2DBarcodeTypeEnumJS(barcodeType));
            // specify the QR barcode value
            barcodeWriterSettings.set_Value(barcodeValue);

            // specify settings for barcode writer
            barcodeWriter.set_Settings(barcodeWriterSettings);

            // send an asynchronous request for getting barcode image as Base64 string
            barcodeWriter.getBarcodeAsBase64Image(__writeBarcode_success, __writeBarcode_failed);
        }

        /**
         * Barcode is generated successfully.
         */
        function __writeBarcode_success(data) {
            if (data.success) {
                var barcodeImage = data.barcodeImage;
                document.getElementById("barcodeImage").src = barcodeImage;
            }
            else {
                alert(data.errorMessage);
            }
        }

        /**
         * Barcode generation is failed.
         */
        function __writeBarcode_failed(data) {
            // show information about error
            alert(data.errorMessage);
        }

    }

}
-
Добавьте созданный компонент React.js в код приложения React.js - файл "ClientApp\src\App.js".
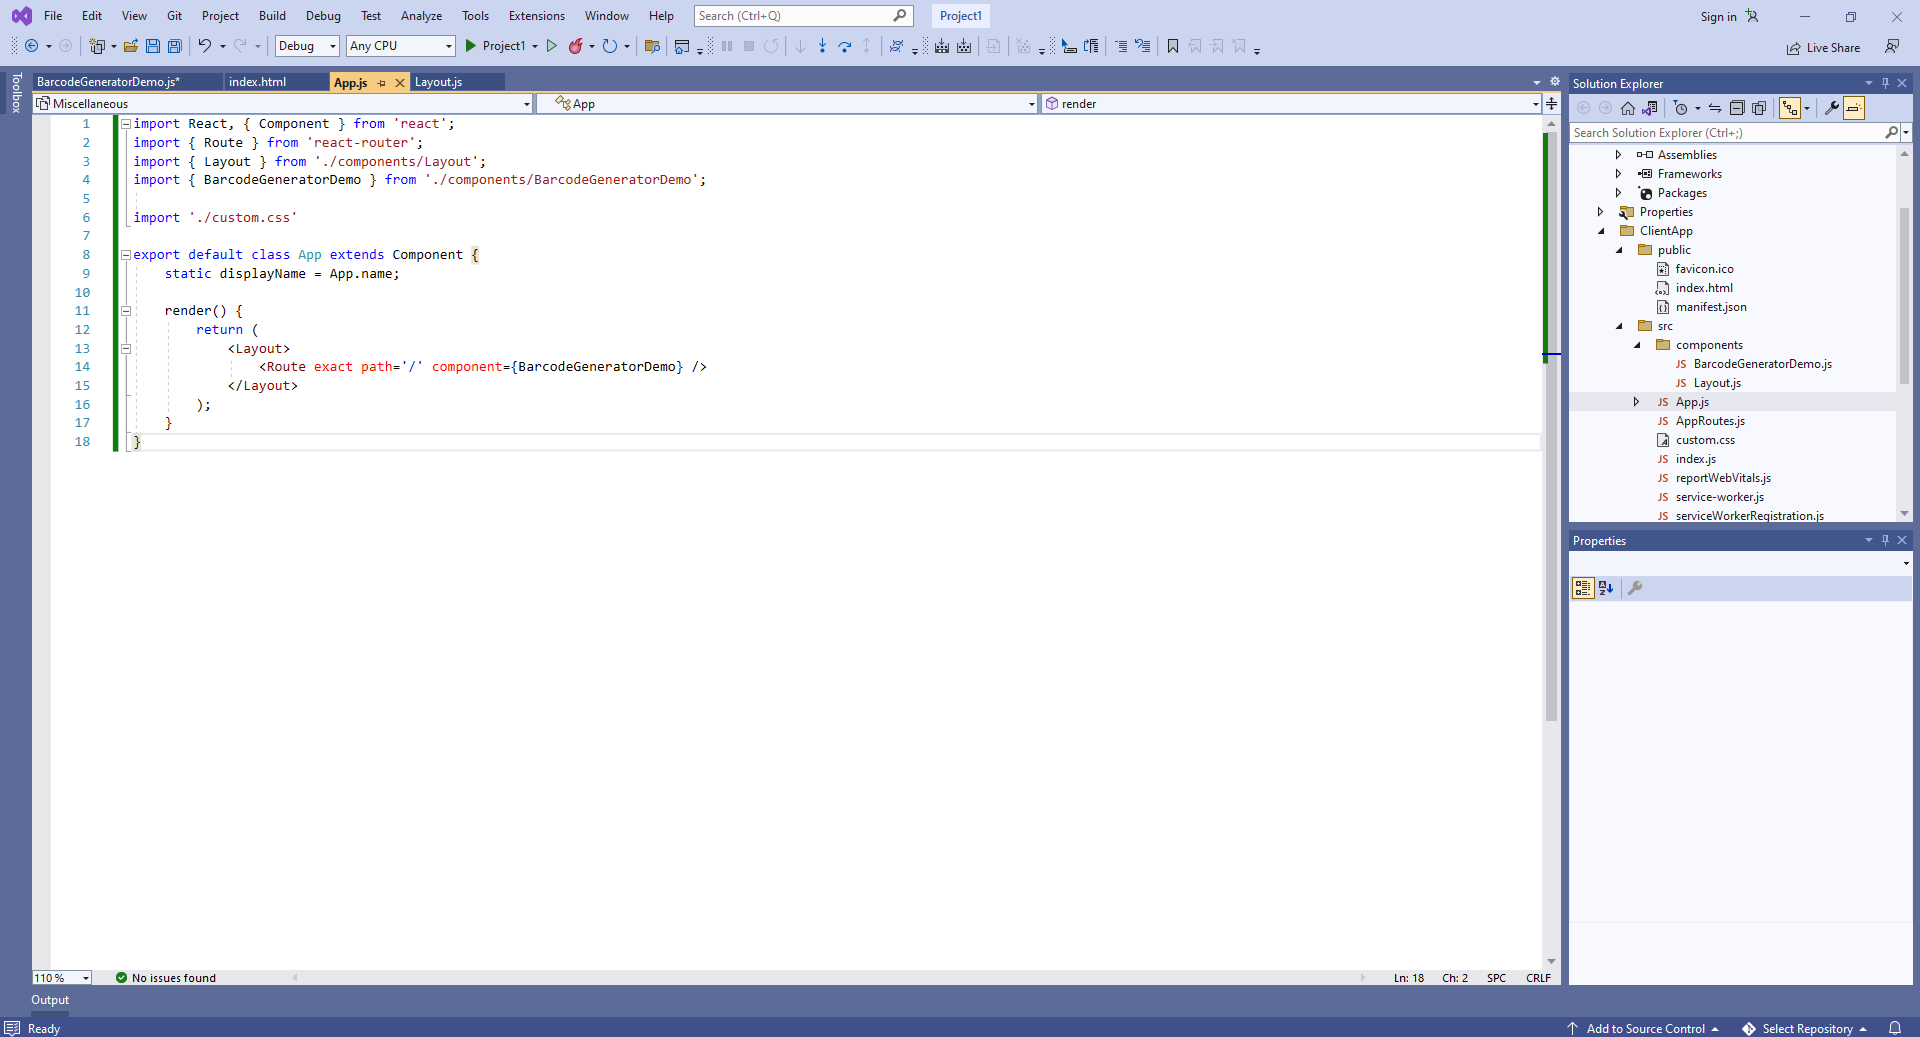
Вот исходные коды файла "App.js" после обновления:
import React, { Component } from 'react';
import { Route } from 'react-router';
import { Layout } from './components/Layout';
import { BarcodeGeneratorDemo } from './components/BarcodeGeneratorDemo';

import './custom.css'

export default class App extends Component {
    static displayName = App.name;

    render() {
        return (
            <Layout>
                <Route exact path='/' component={BarcodeGeneratorDemo} />
            </Layout>
        );
    }
}
-
Запустите веб-приложение ASP.NET Core на React.js и оцените результат.
